WEEK
FIFTEEN
Wildcard Week
Task for this Week
Individual Assignment
Design and produce something with a digital fabrication process (incorporating computer-aided design and manufacturing) not covered inanother assignment, documenting the requirements that your assignment meets, and including everything necessary to reproduce it. Possibilities
include (but are not limited to):
So I decided to use two machine this week which I dont use in my previous assignment. The first machine is computerized embroidery machine and the second
One i am going to use plasma cutter machine.
Computerized Embroidery Machine
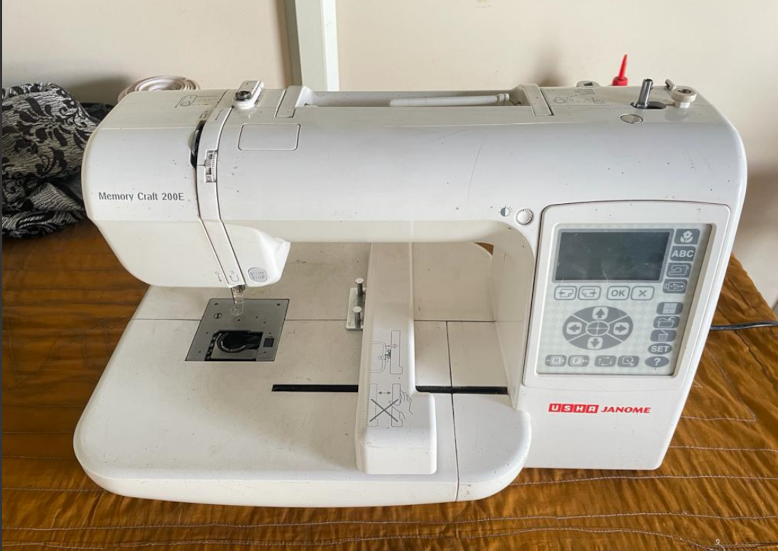
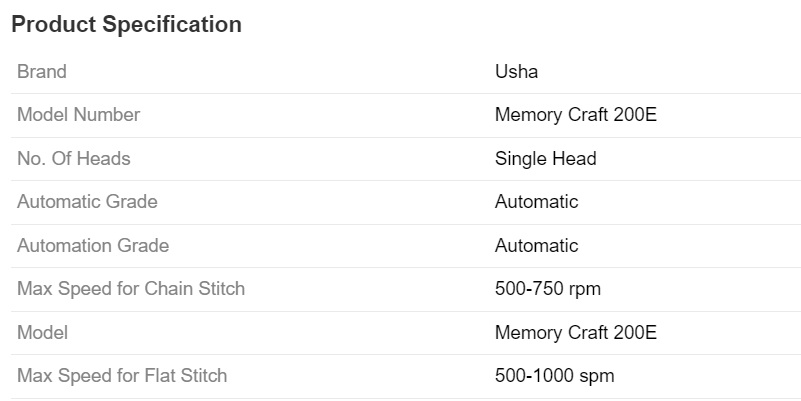
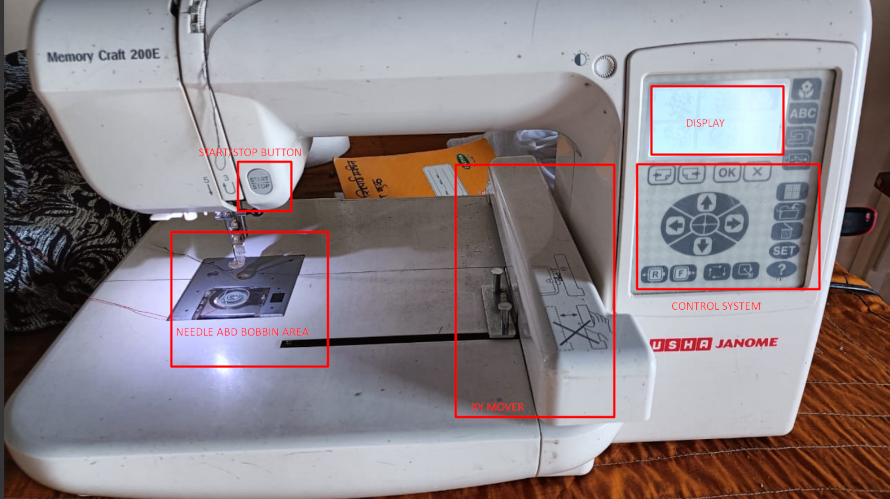
So firstly I decided to work on Enbroidery machine. We have USHA janome memory craft 200e machine. This is computerized machine and work on cnc platform
we have to ready the file and upload the file in it. It have two size cloth holder one is 75mm*75mm and another one is 150mm*150mm.
This machine can draw design, Text on the cloth. It also have some inbuilt designs we can also made on clothes. The size of the machine is about 560mm*425mm*
383mm (lenght, height, breadth respectively). The other machine details are shown below
Refrence
Embroidery Process
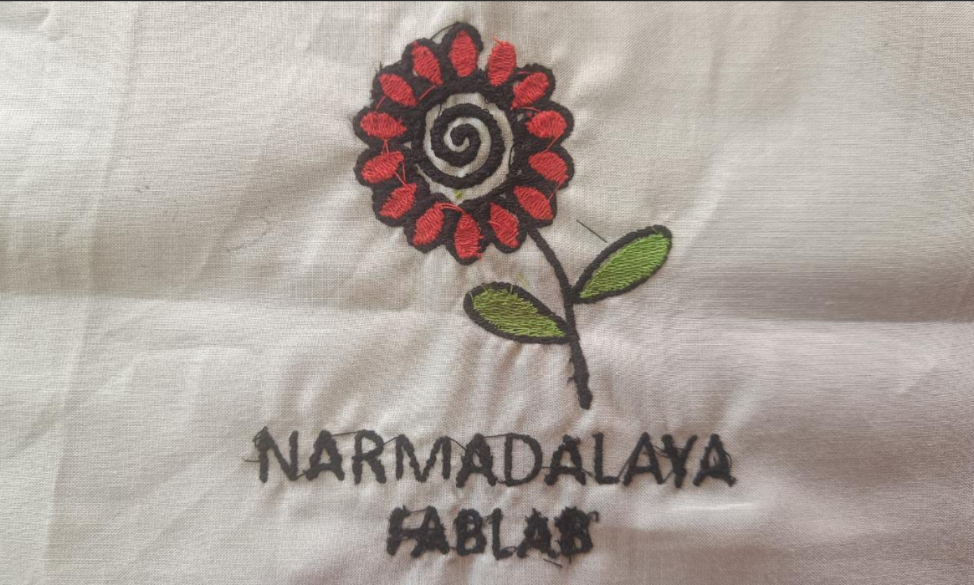
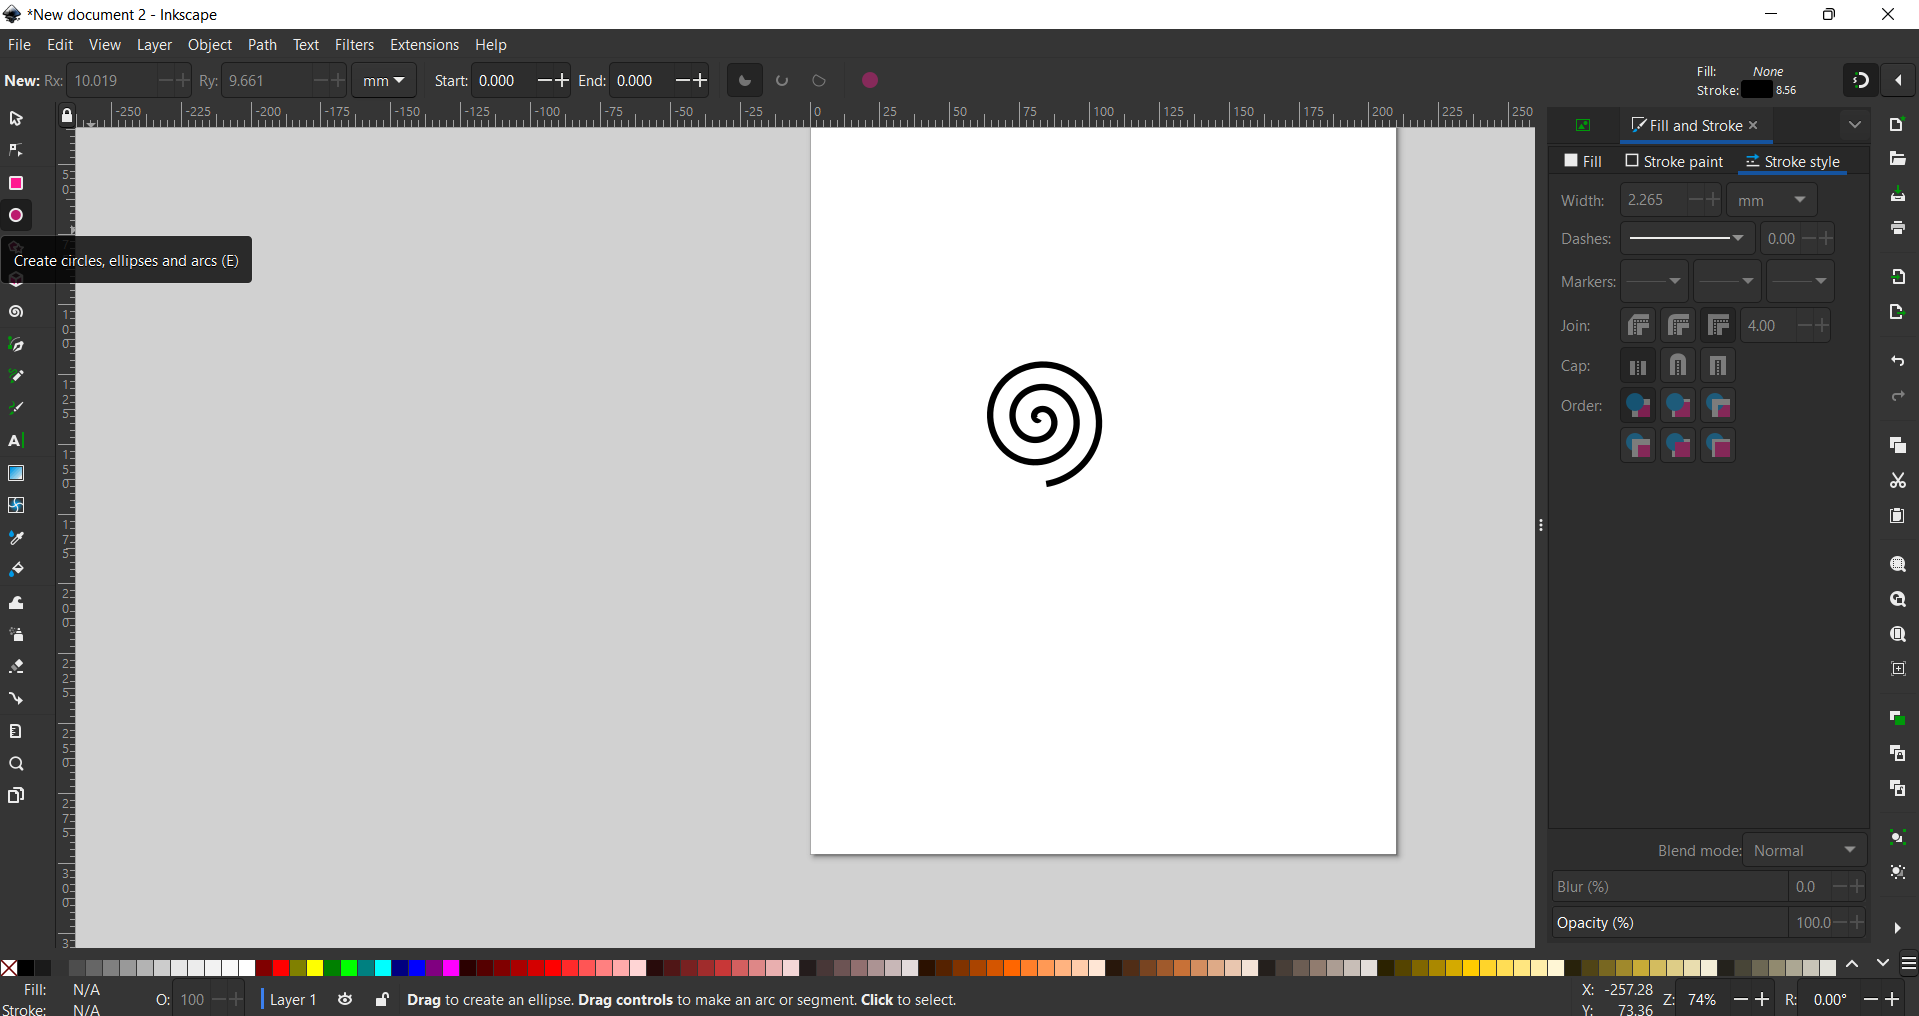
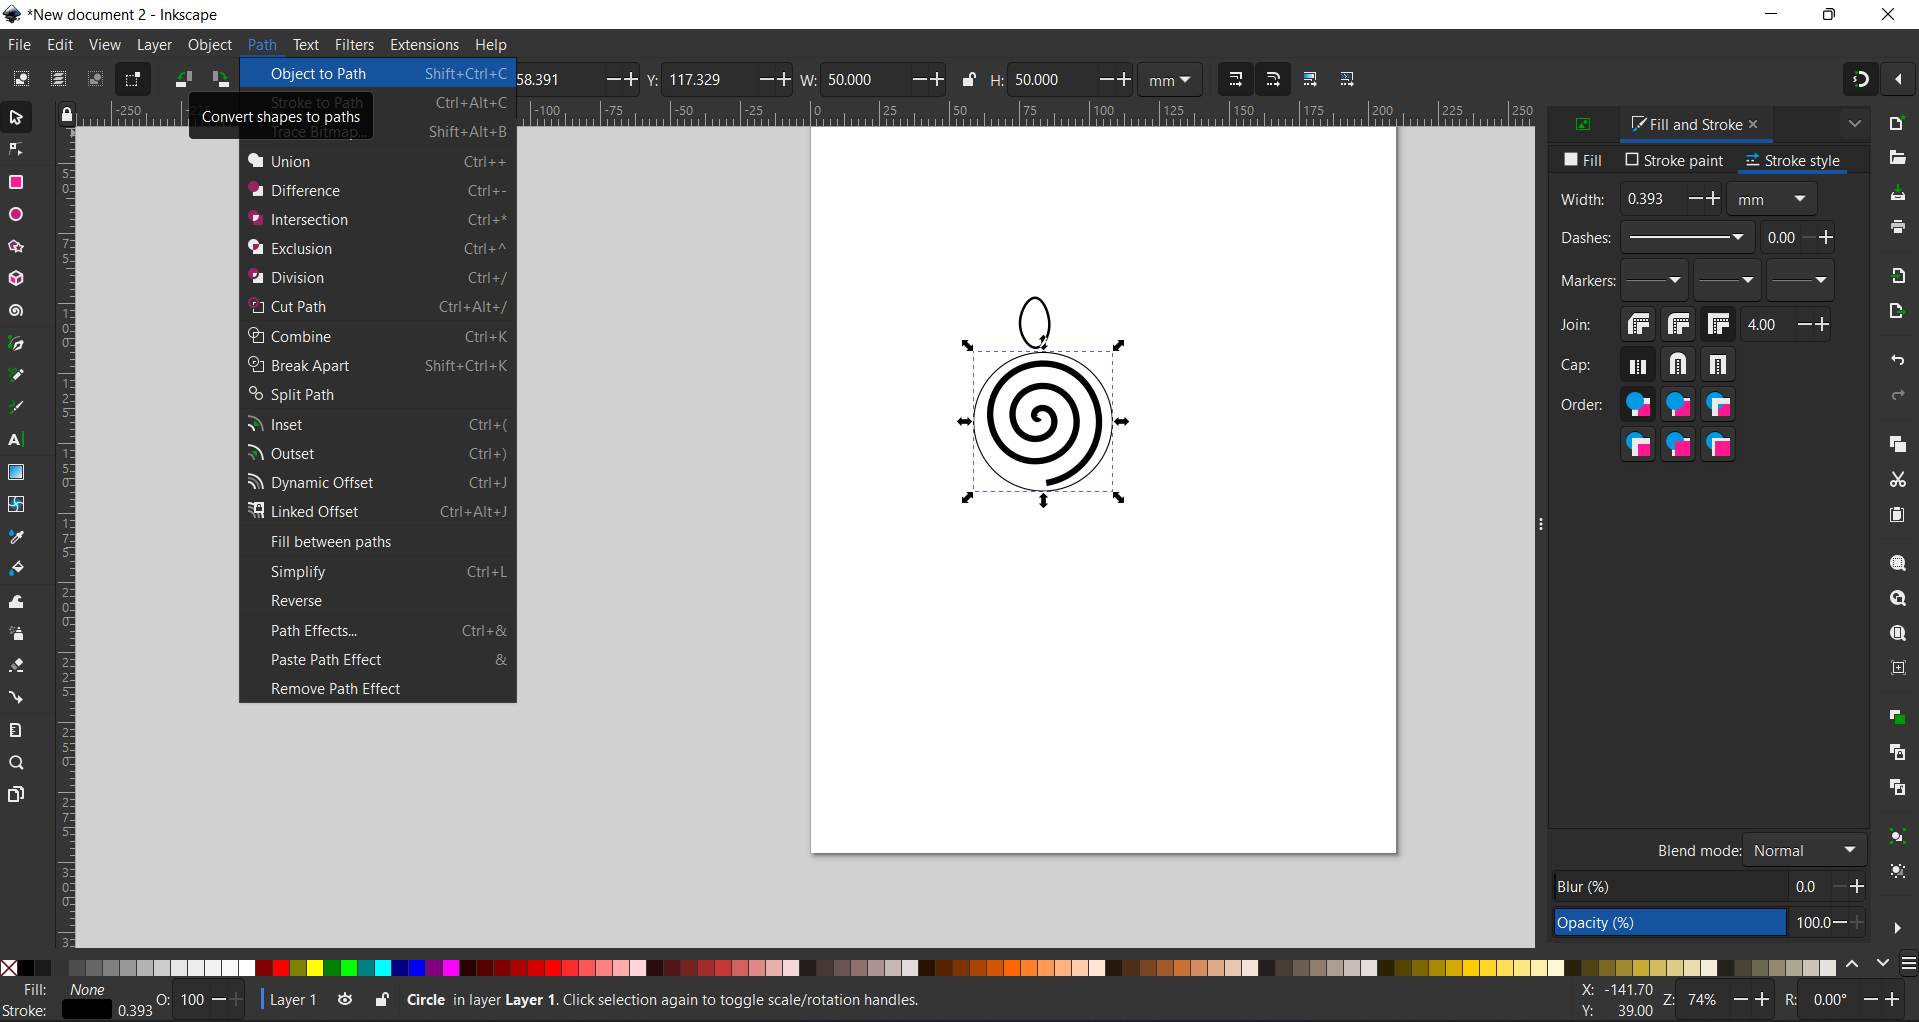
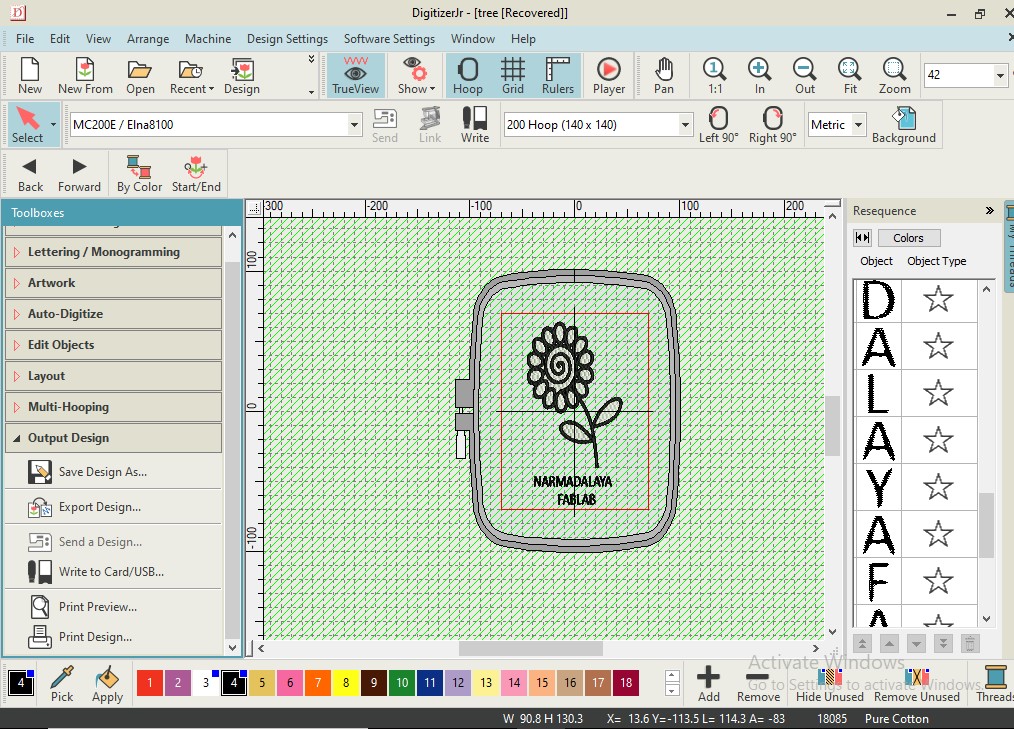
So firstly we have to design something which we want to embroid on our cloth. so for the design I choose Inkscape and deasign a flower and my lab name.firstly I take a spiral and then I design a leaf like structure and then draw a circle around the spiral and then select circle and make them as path
and copy the leaf structure
After that I go the path effect and select "pattern along path " and here I paste the path and adjust the number of leaf structure and then I draw a stem
of the Flower and then draw leaves for it. After that I Increased the thickness of flower leaves and then I write the name of My Lab at bottom side.
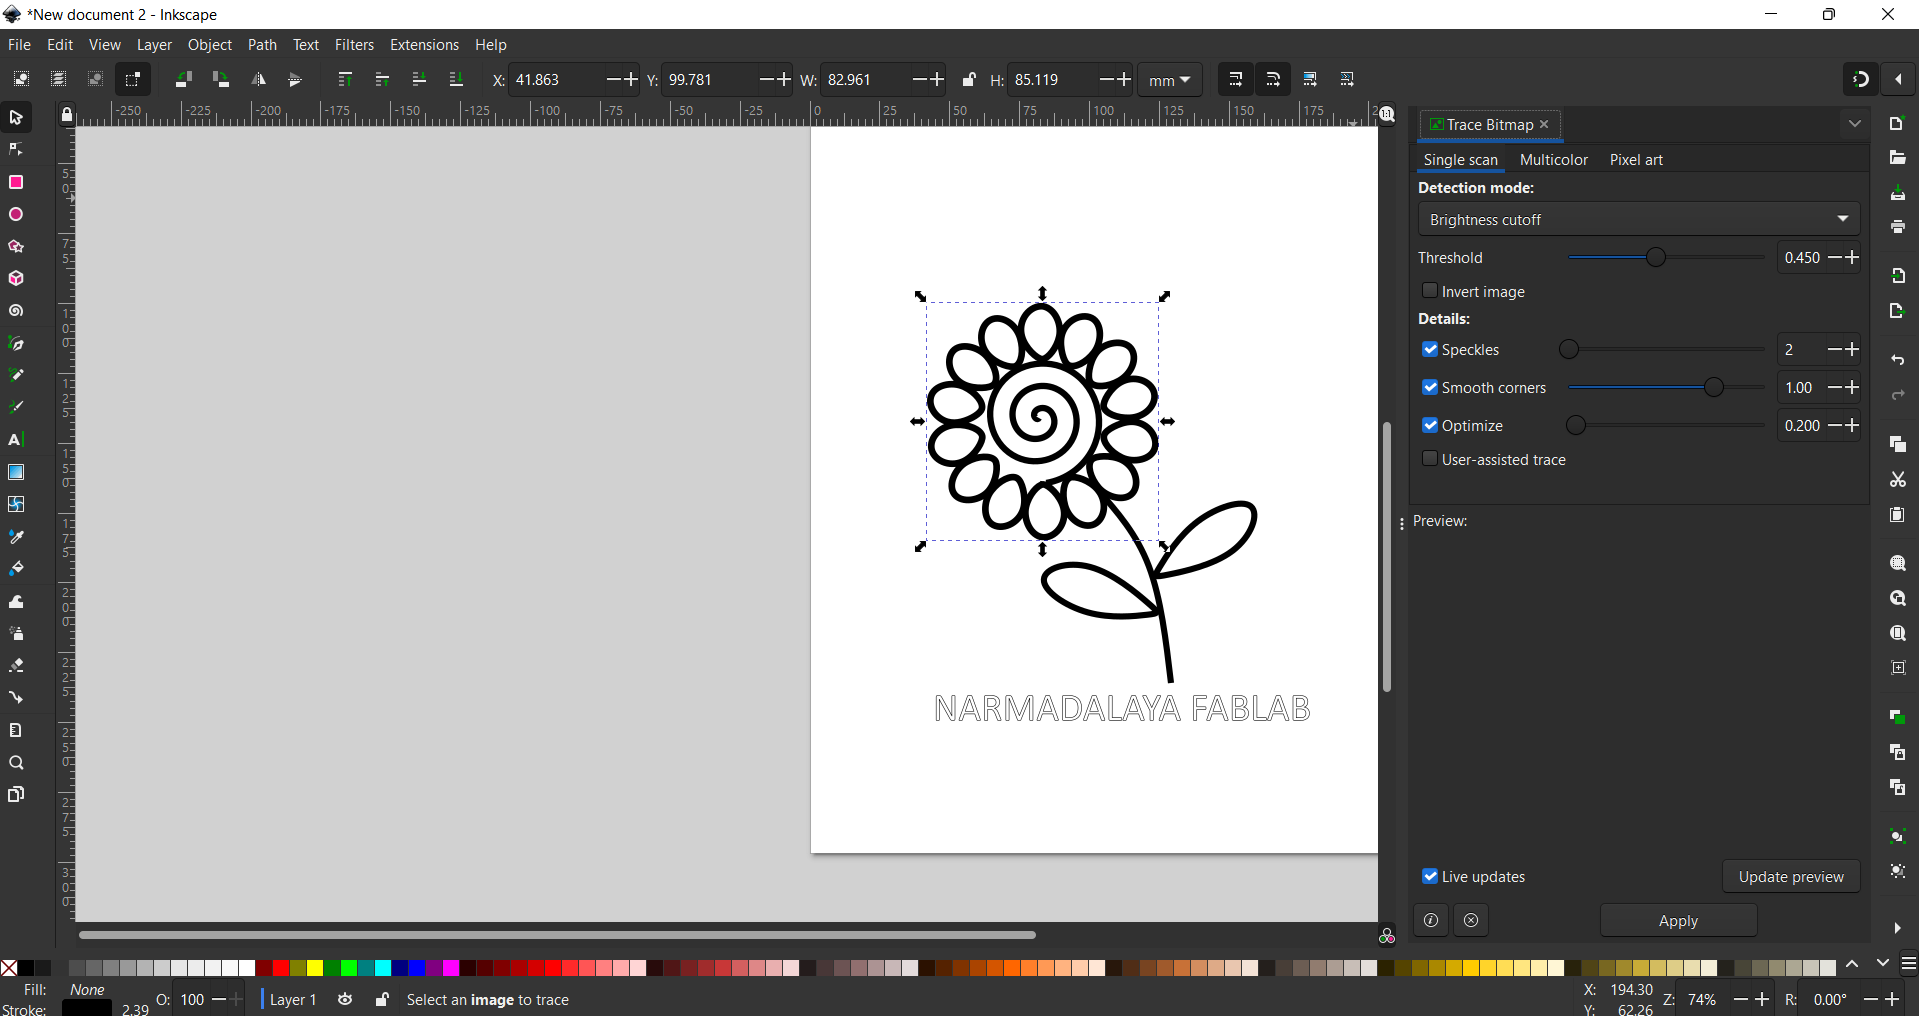
After that I export the file in png formate and open this file in machine software.
software used
The name of machine software is Digitizerjr. When I open it, its first open window is look like that
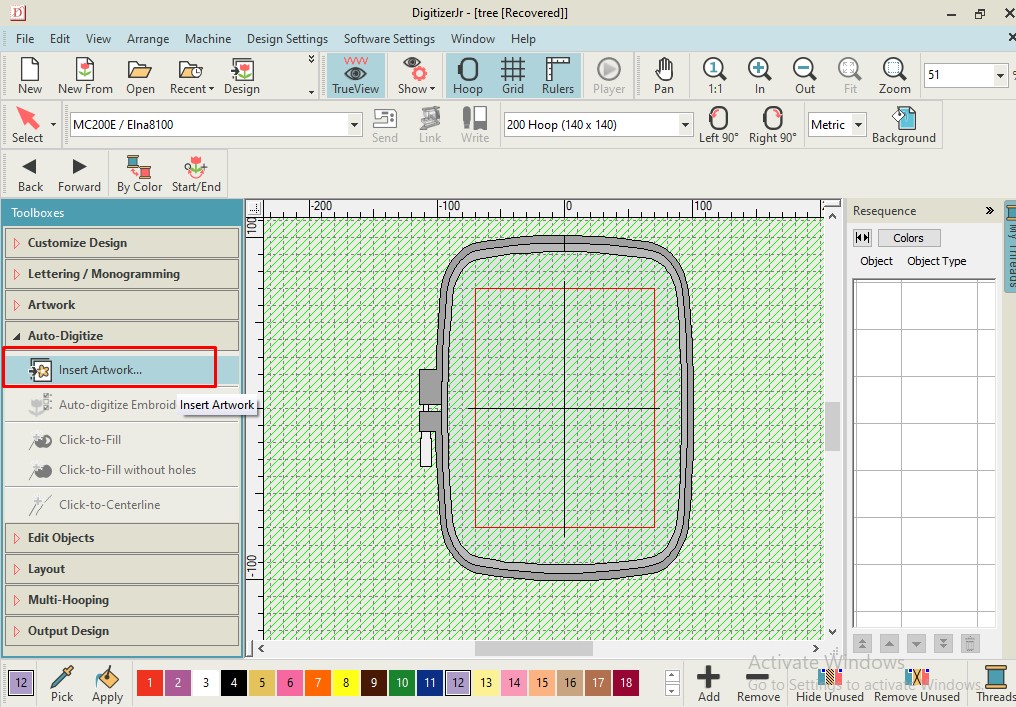
After that I select "Auto digitize" option and in this I select insert art work option and select the file.
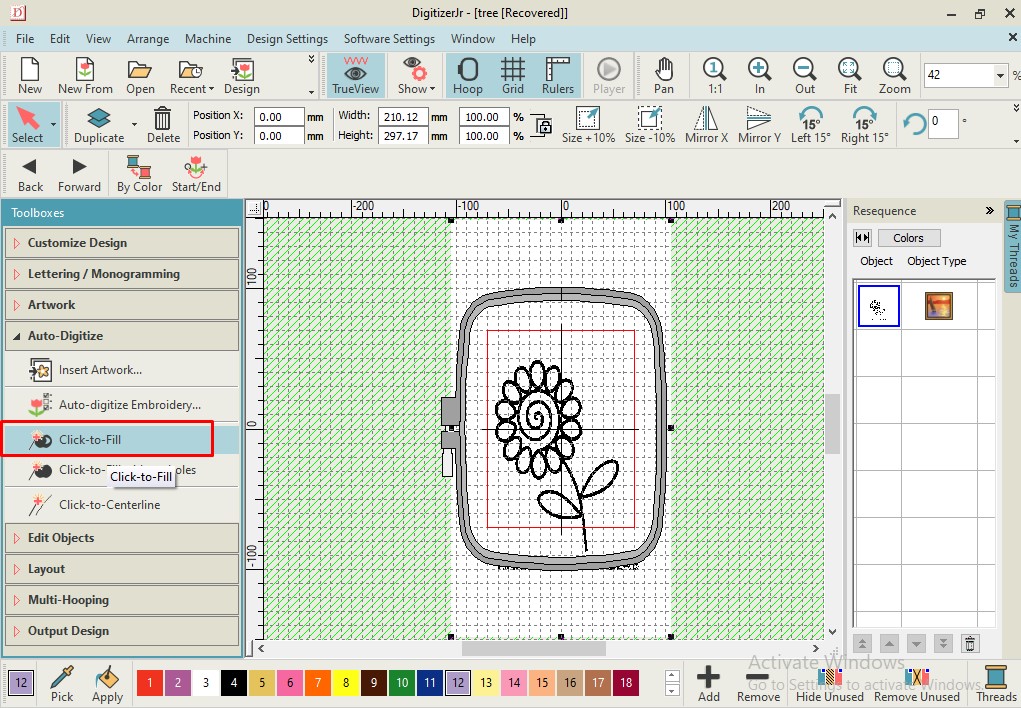
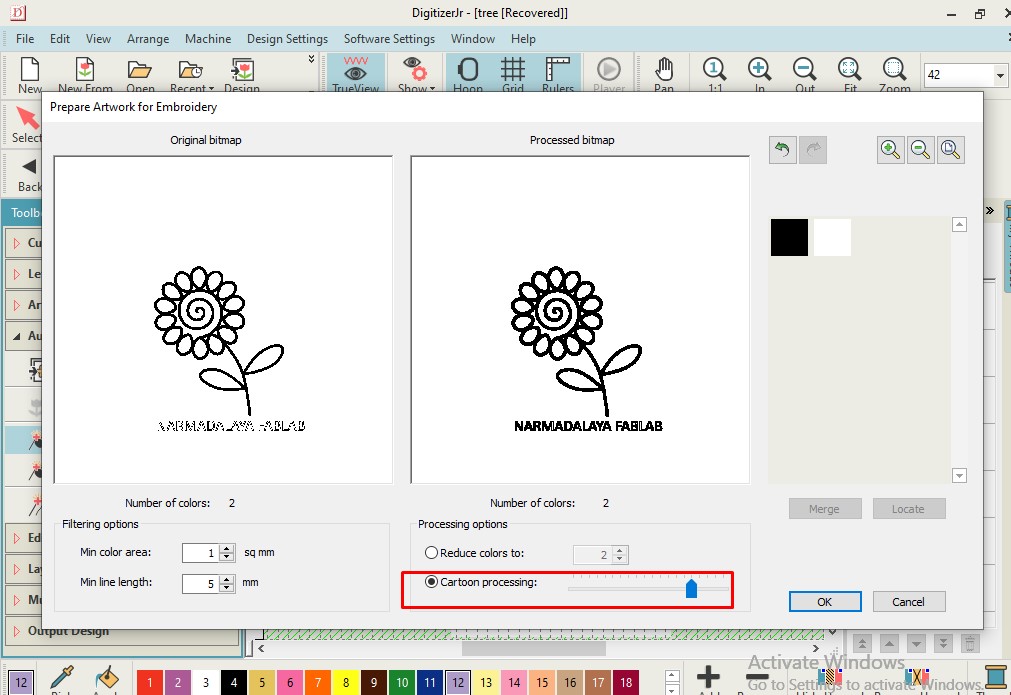
After that I select "click to fit" Option in auto digitize and then click on my selcted file and then a new window appear. In this window I select
cartoon processing option and adjust its value.
After that I select the ebroidery part in the design and adjust it according to my cloth holder frame. I see that my text not come in frame so I adjust
The frame again and select the test and adjudt the name. The text fablab I set at the down side of text Narmadalaya.
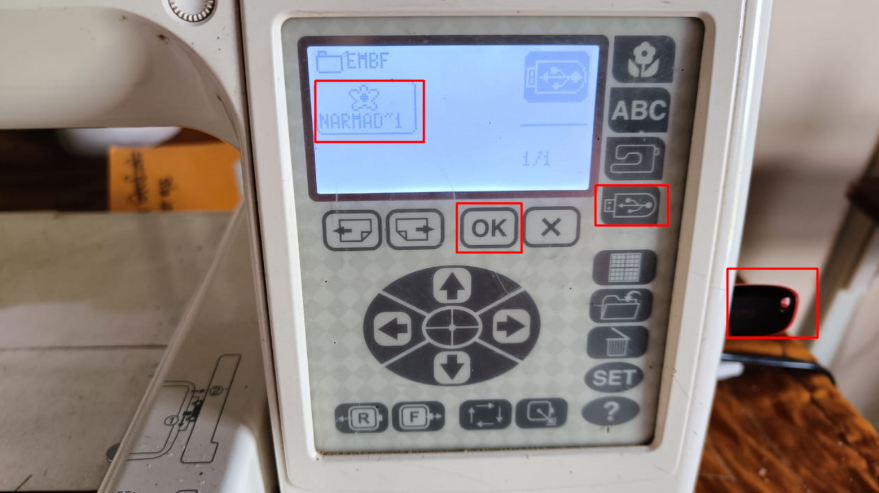
Then i select output Design section and select the "write to card " option and then select folder save the file.
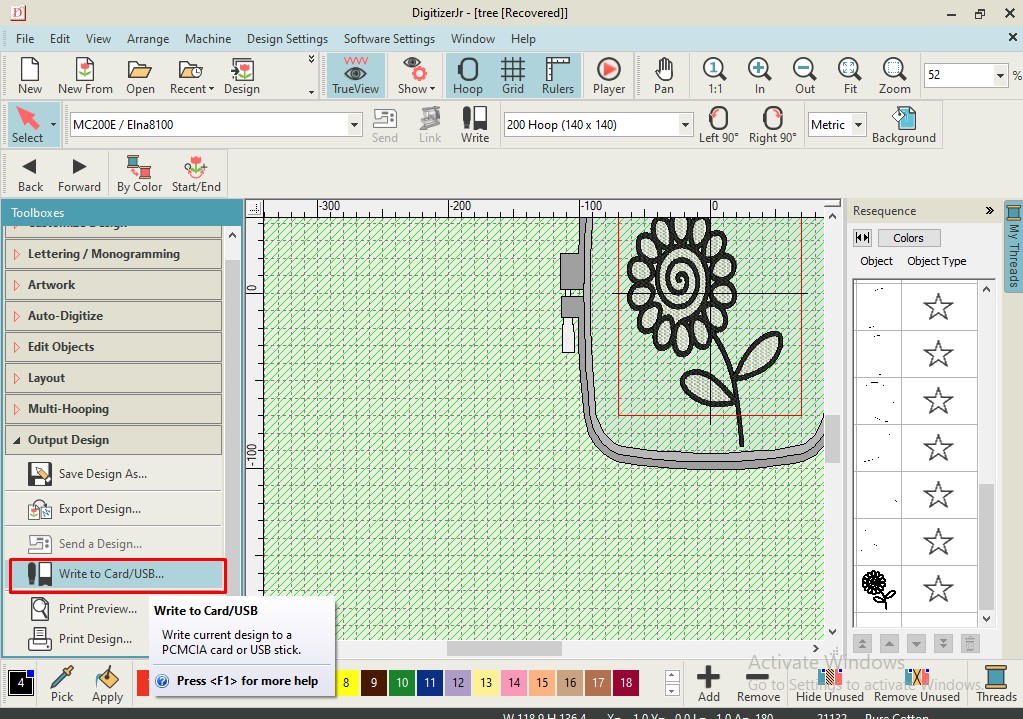
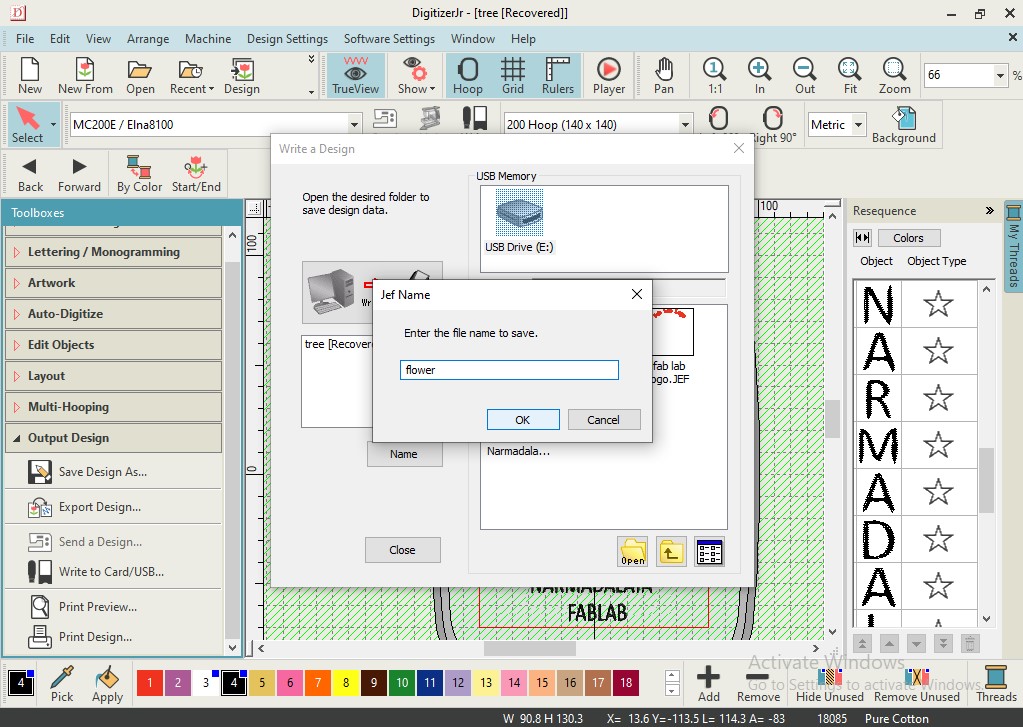
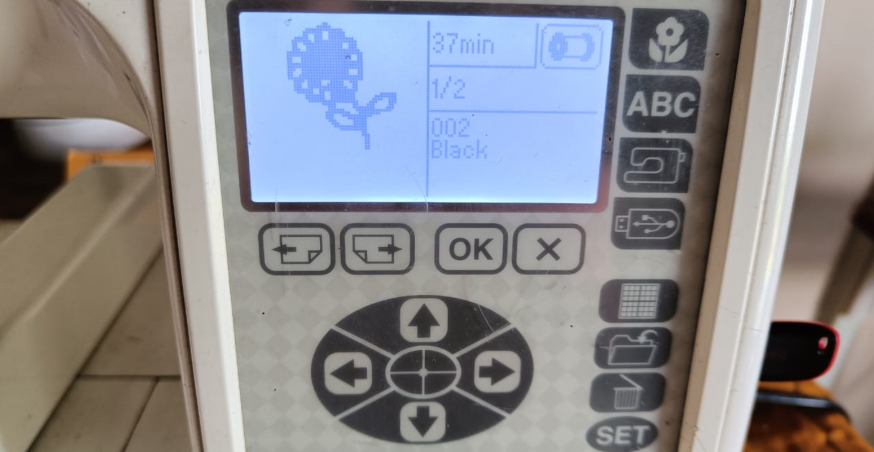
After that I upload the file and select USB option and then open the file and press ok. Now we have to ready the the cloth holder for this .
so I take a cloth piece and paper cloth and adjust them and attached to the machine. After that I feel the bobbin with black color to make outer layer
and then I set the thread into the needle and start the process.
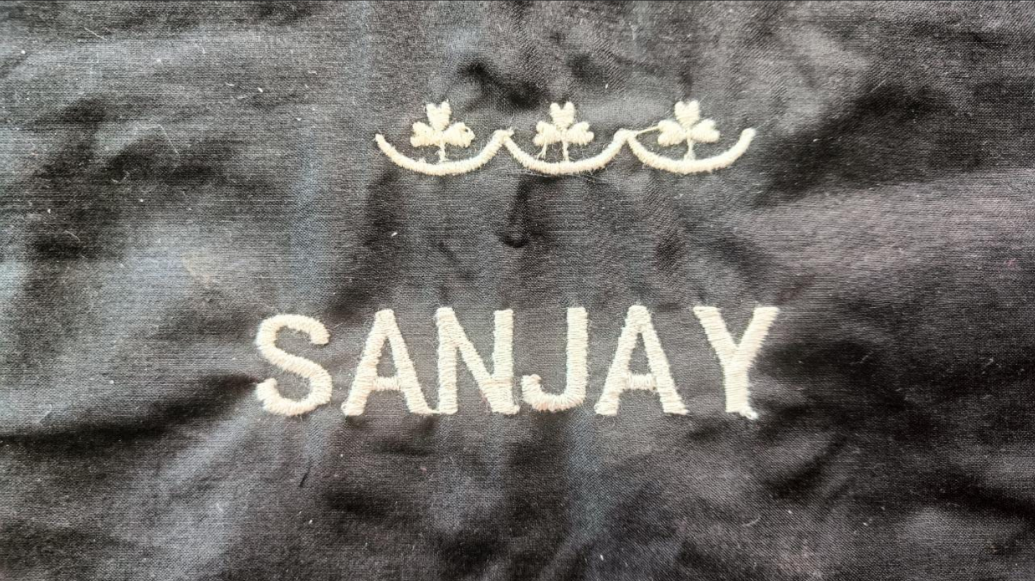
After that border part I change the color. So feel the bobbin with different color and then set that to the needle and then select internal part
of the design and then start the machine again. Then I do this process for leaves and text also.
Operational Video
and then the final result is look like that
I also write my name on the cloth with design
plasma Cutter
Now the second machine I am gonna used is plasma cutter. We know about the three state of matter which is solid, liquid and gases. but when we super heatthe gaseous state Its particle ionised . The negative charge and positive charge are separated. and electron loos their orbit. This phenomenon is
happened when we heat the gaseous on 12000 C or more than it. At This stage the gase coverted into plasm and its known as fourth stage of matter.
When we take close two wire of high voltage than the arc is produced between them is also a plasma. The lightning we see in the sky due to the
friction between two cloud is also a plasma.
Working Mechanism
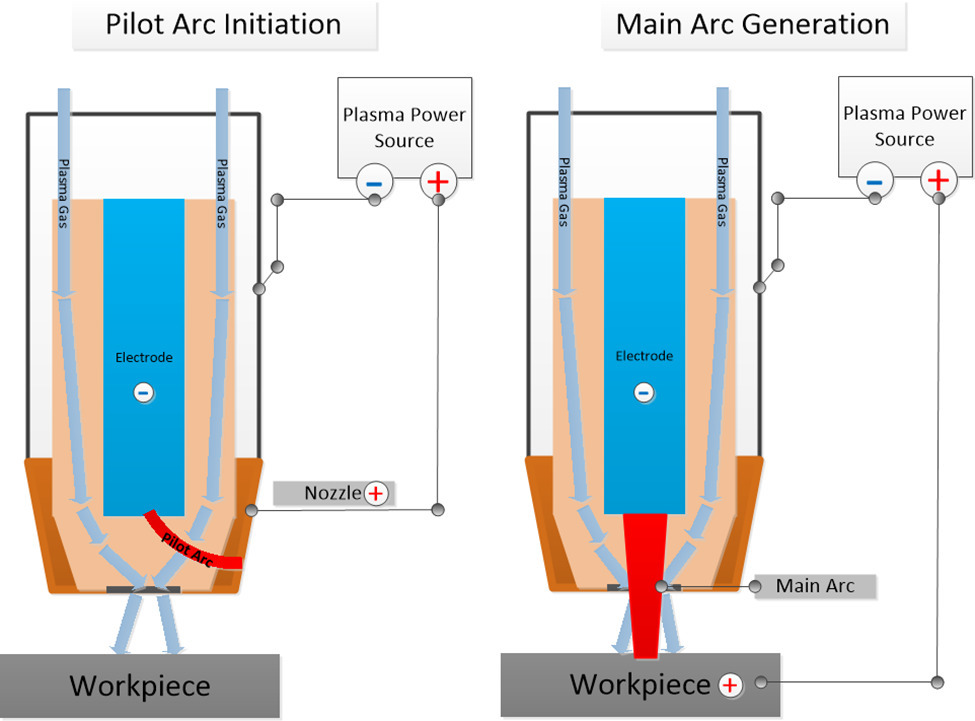
In plasma cutting process We dont cut the material mechanically. We cut the metal by high temperature. It only cut the conductive metal There is a nozzle
which connected with the Electrode(negative). When the cutting gas passed through this electrode(positive), The gases converted into its ionised stage , which
is stage of plasma. Now the another electrode connect to the metal and then the circuit for plasma is completed. Then this generated plasma cut the metal due to
its High Temperature. The gases we are using for the cutting are air, nitogen, argon and hydrogen. this different gases have different cutting depth
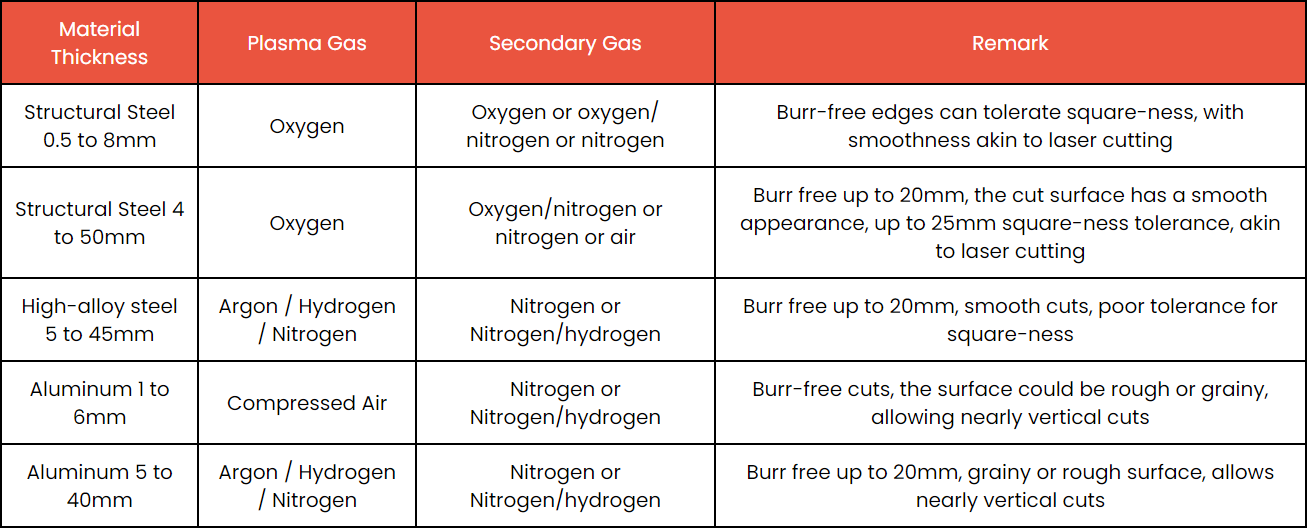
The material mainy used for cutting in the plasma cutter are mild steel, Stainless steel, copper, brass and cast iron. We also used sheild gases which protect
and cool the nozzle and cutting material. its high pressure blow down the cutting material peices.
Refrence
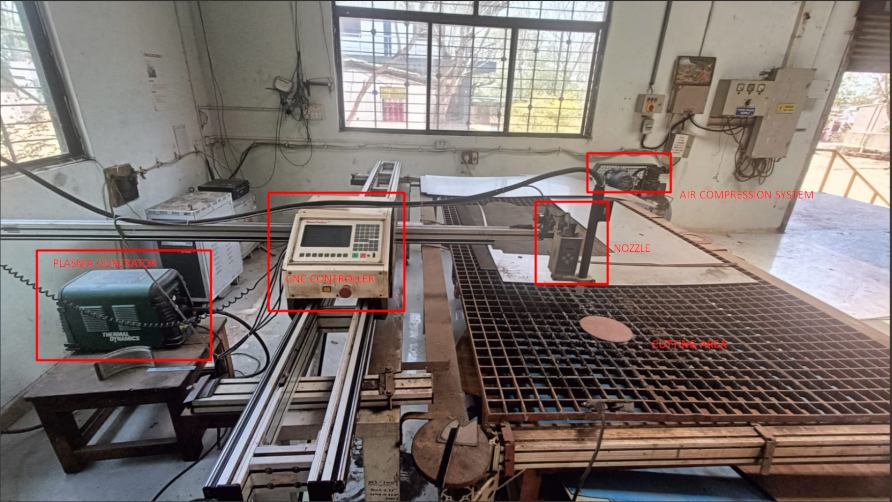
We have compressed air based cnc plasma cutting machine. In which we supply the compressed air into the plasam generator and then this plasma generator
send the gas and high voltage electrode to the material. This CNC machine can cut the material of thickness of 5 mm. Its have cutting area about 4ft*8ft.
Design
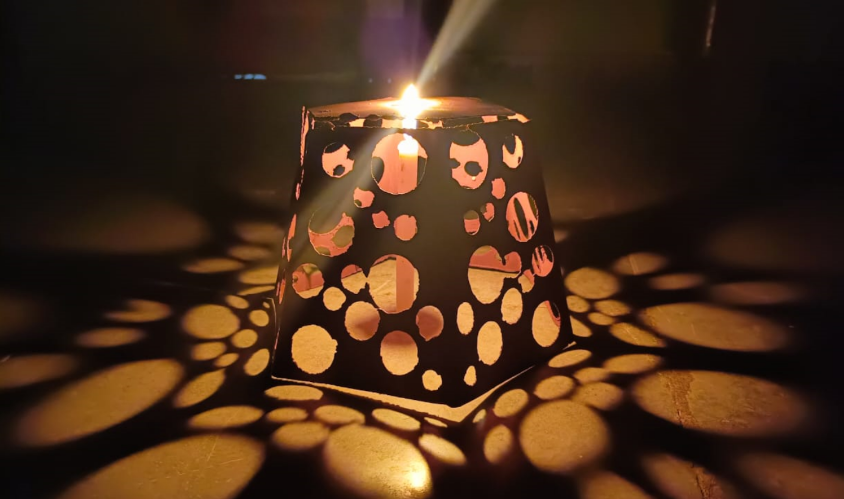
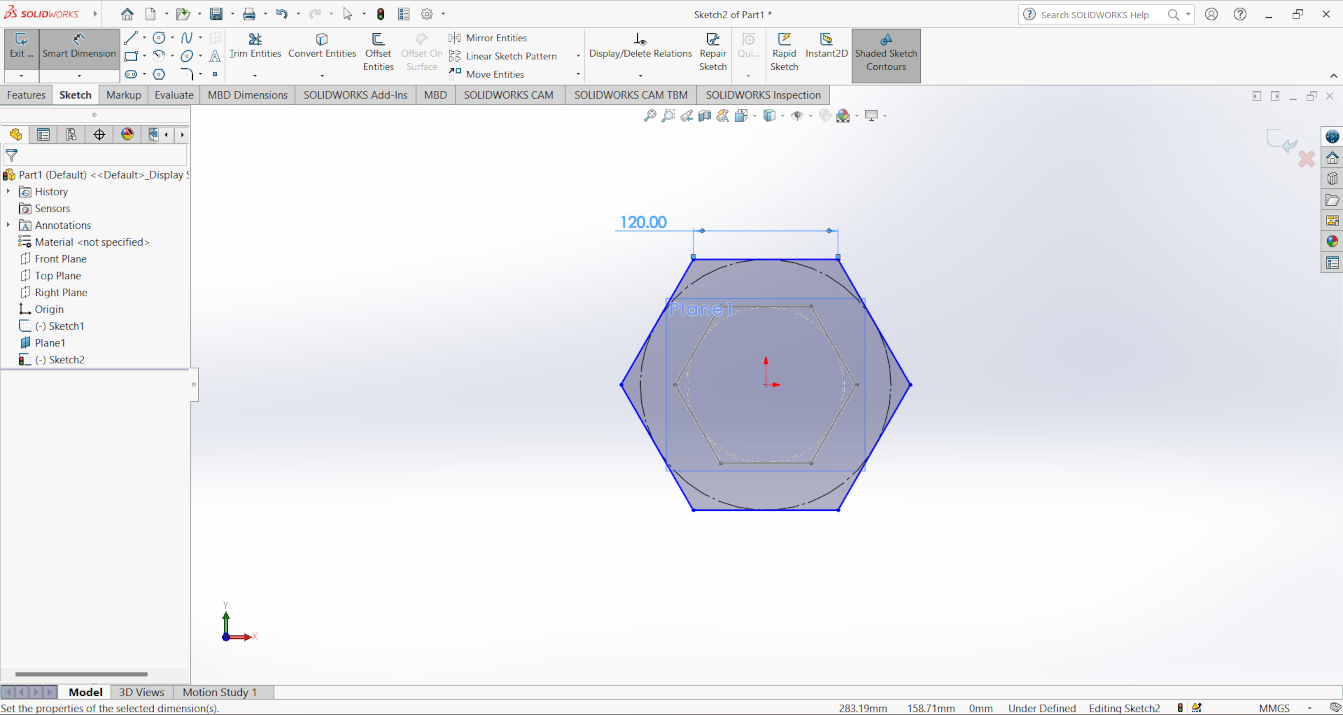
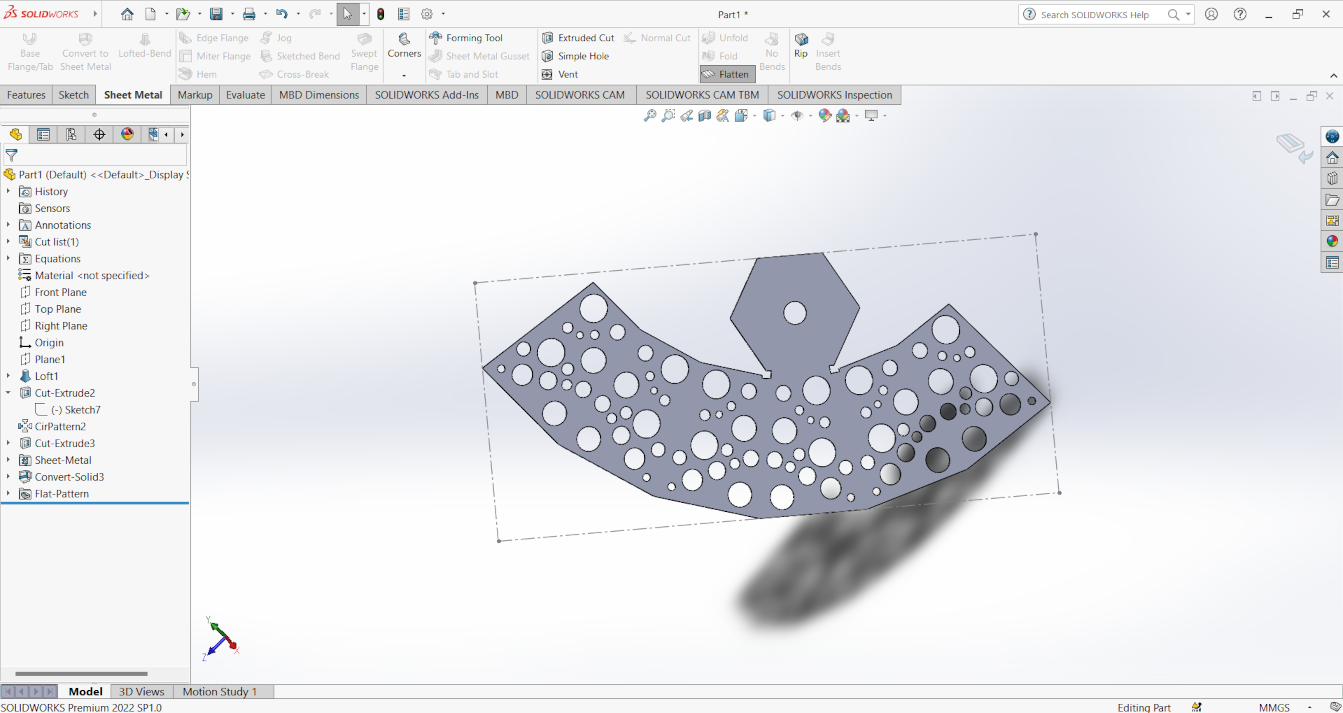
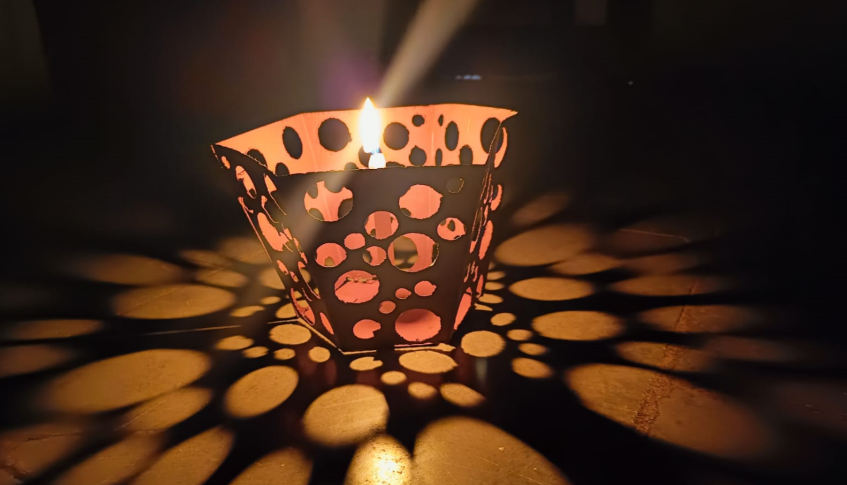
I decided to make a lamp by using plasma cutter machine. So I design the lamp on solidworks. firstly I selec a plane and make a hexagonal on it andgive the dimension to the side of hexagonal.

After that I select another plan make parralel or refrence to the previous plan and then make another hexagonal on that plane and give it dimension
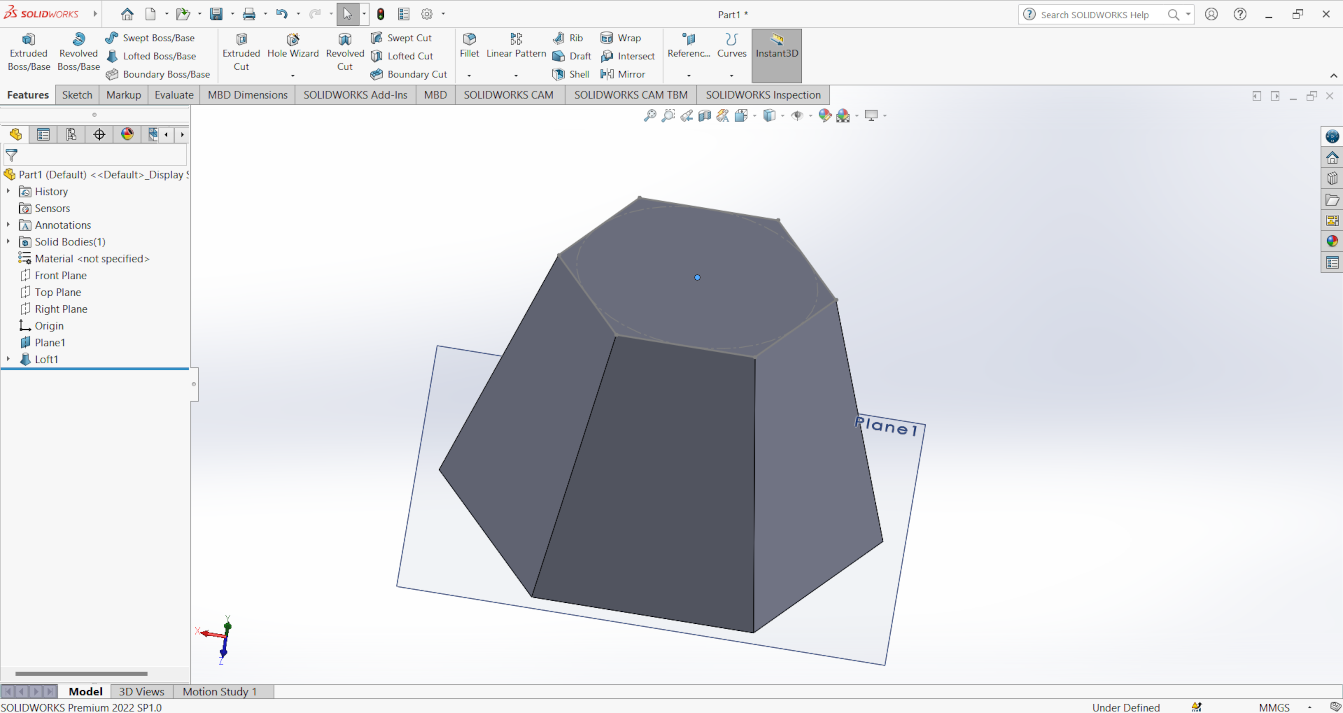
After that I uesd Loft command and join the two sketch into solid.
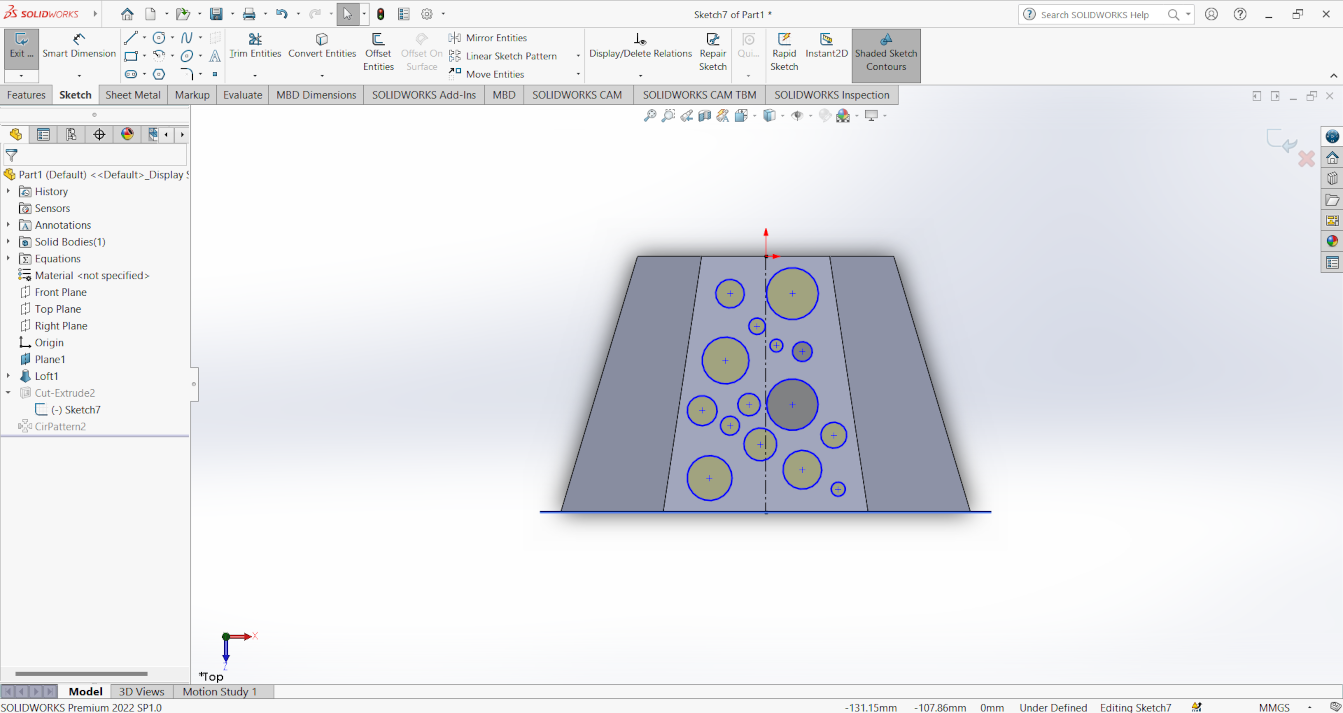
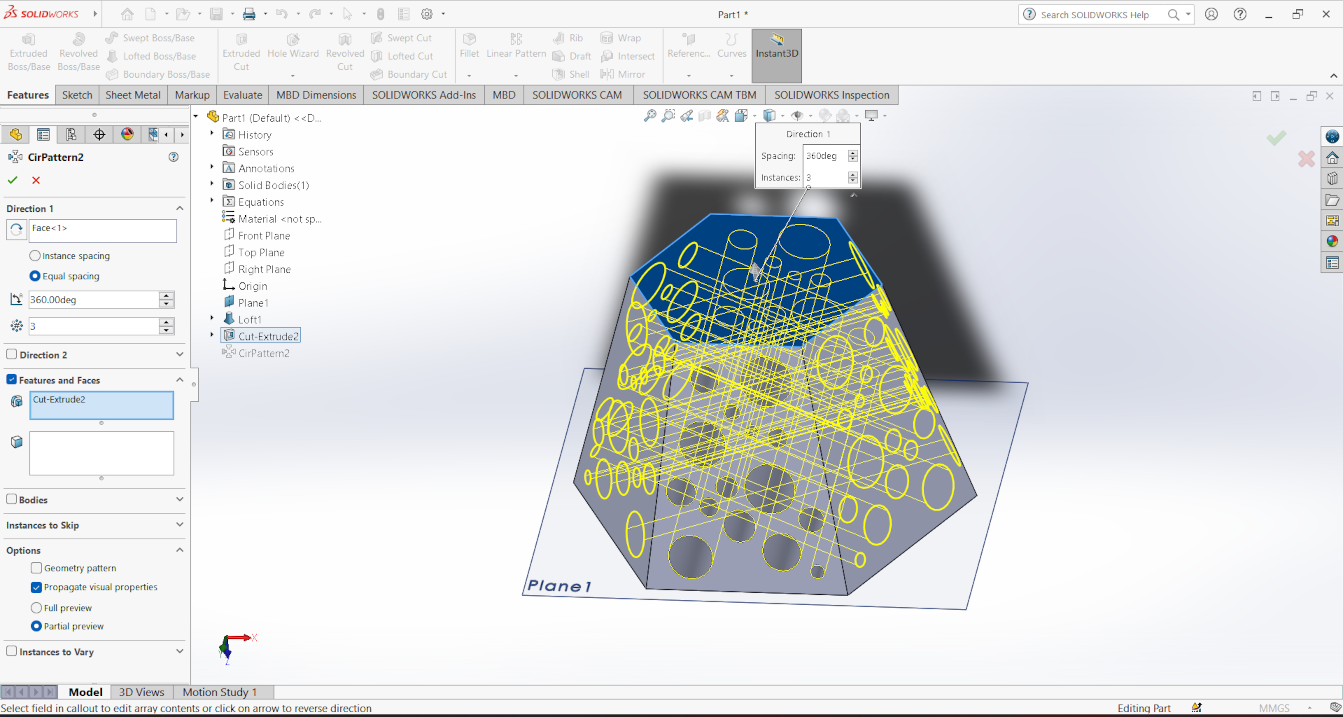
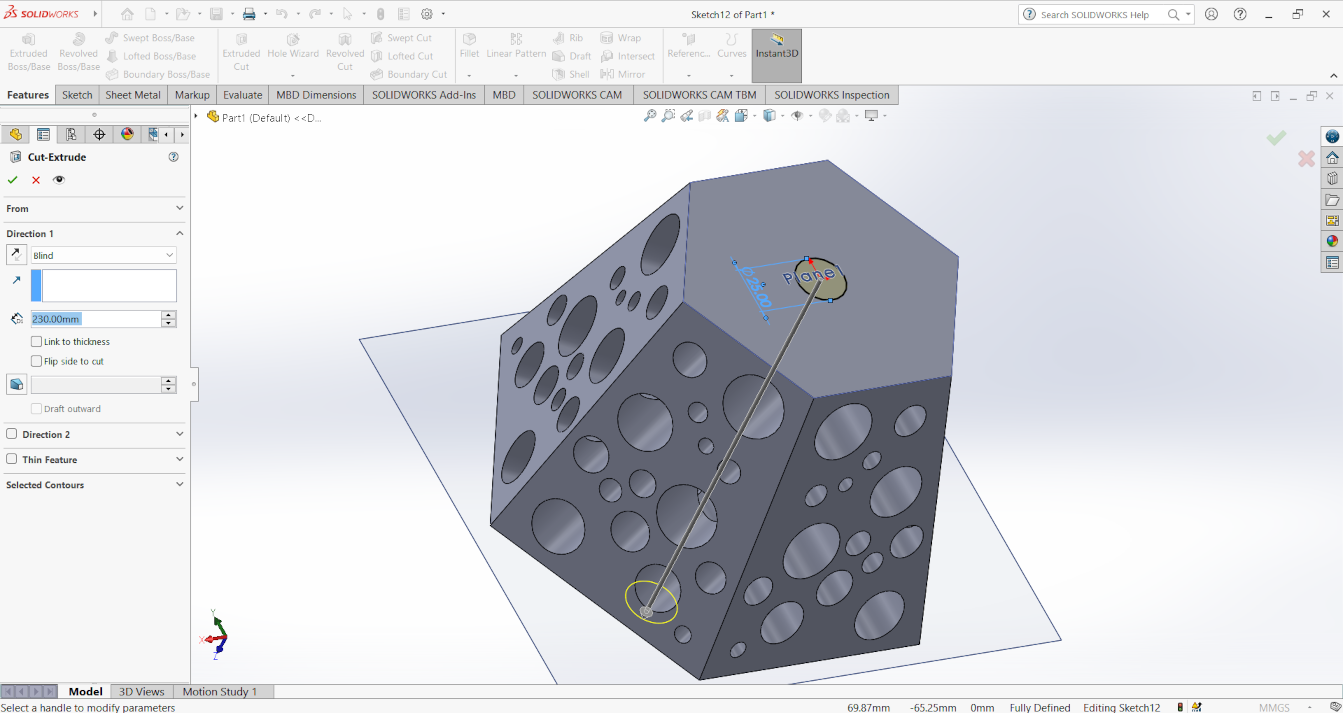
After that I select a plan according to side of body and then make design with holes and then I use extrude cut and this design appear on the both
the phase. after that I used circular array command and then select phase where I want to cut this design. I also make a hole on top of it
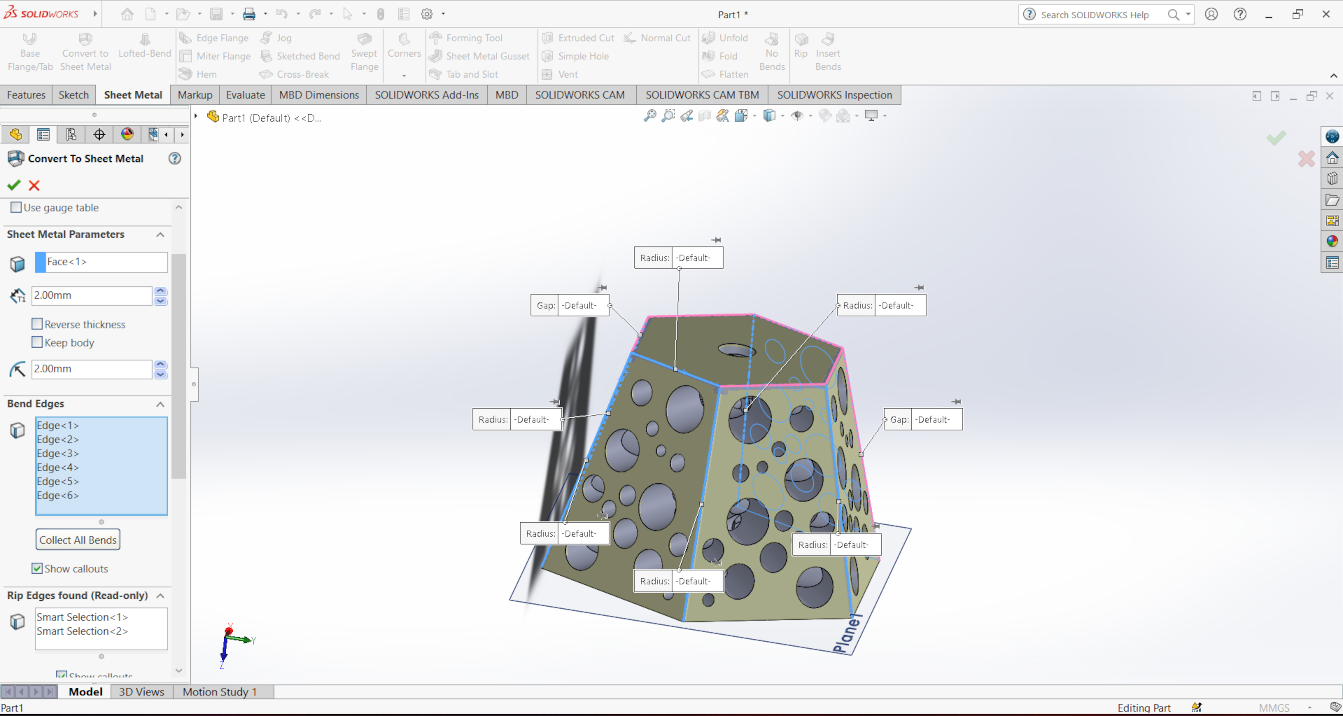
After that I go sheet metal option and then select "convert to sheet metal" option and then here i select a face after that I select the bending edges
and select the radius about 2mm and maerial thickness about 2mm and then ok


After that I select the flatten option and then save the file in DXF formate
GCODE generation
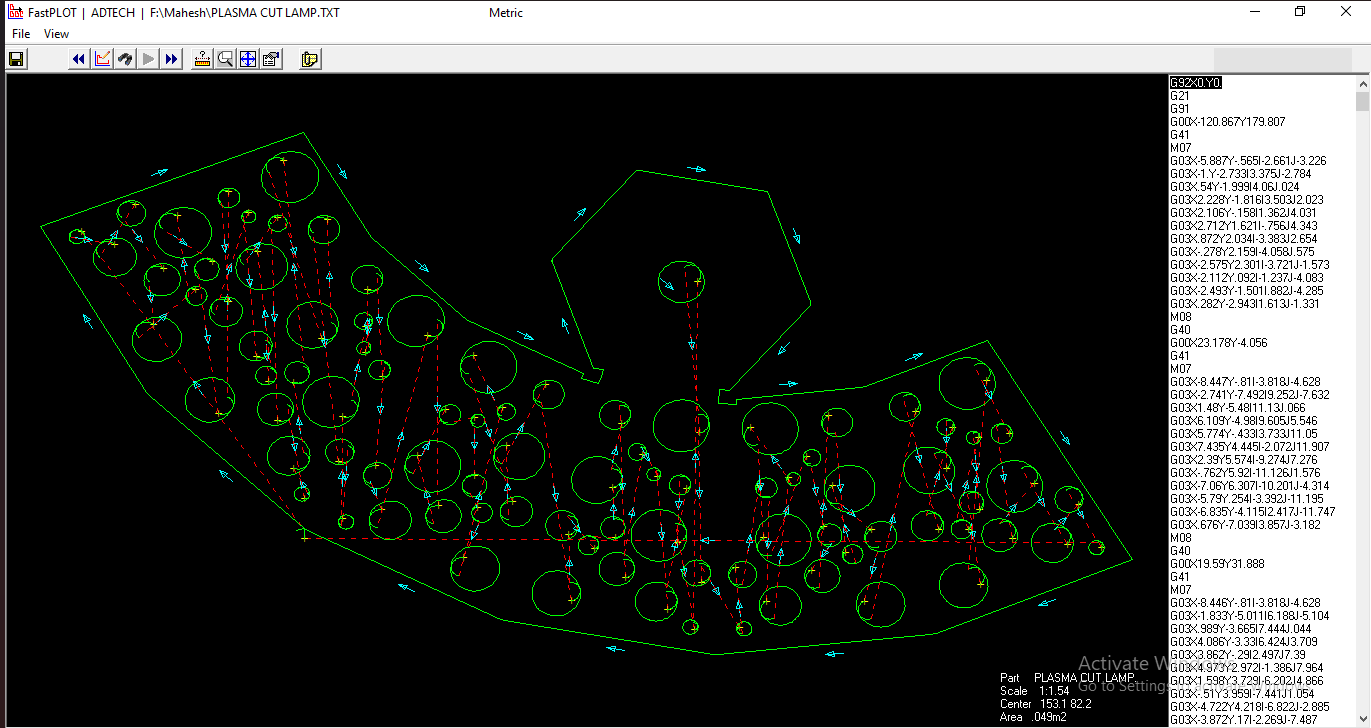
For the GCODE generate i used FASTCAM software. I open the software and then go the the file section and then select DXF restore option.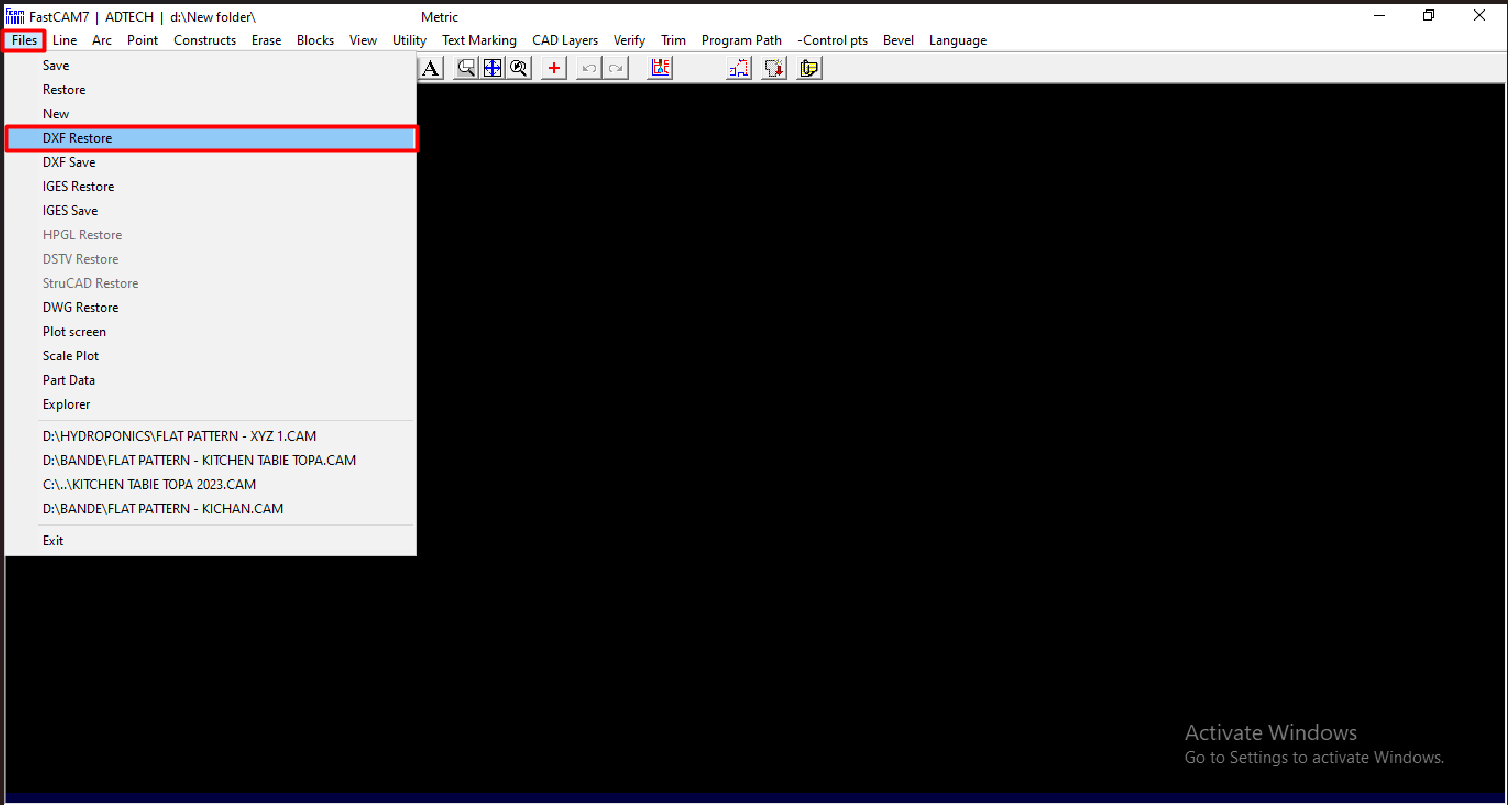
then a new window open with some dxf option and set single file optiona and metric in unit and then check the cad clean and cad fix option

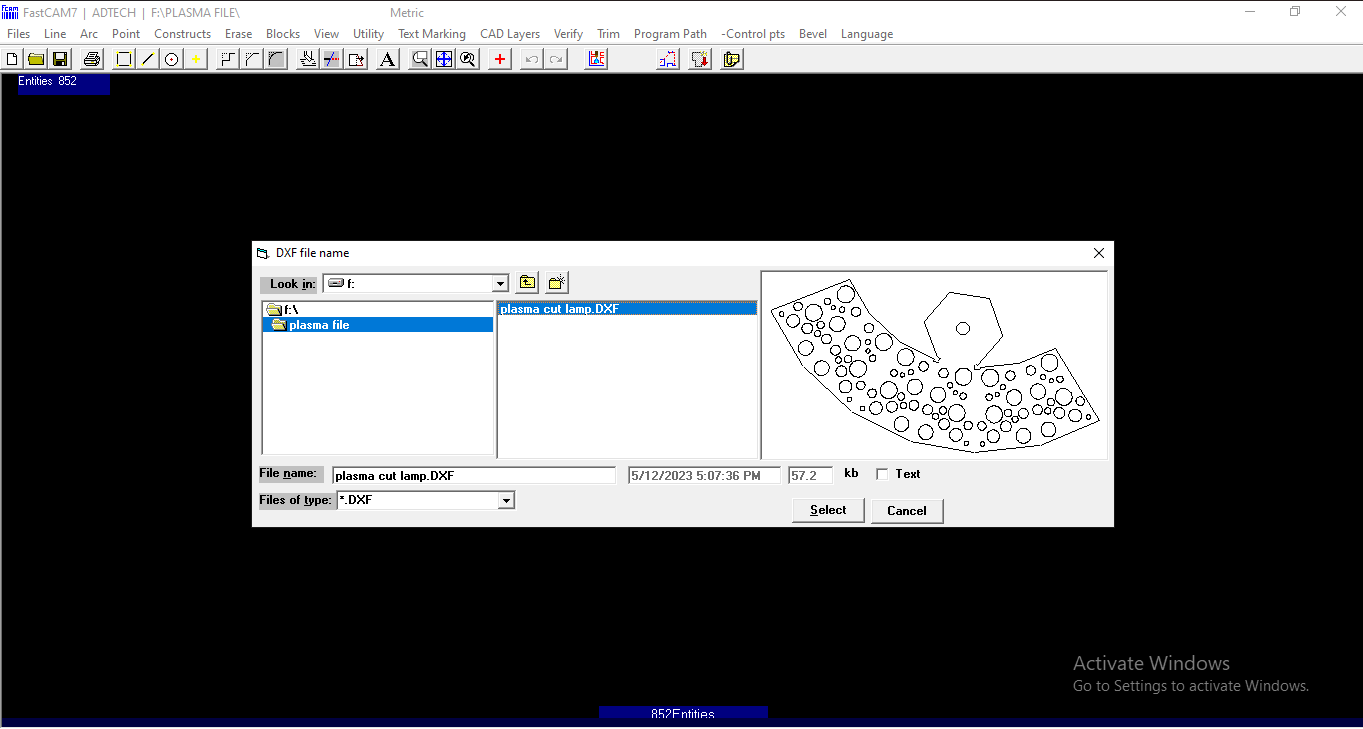
After that a file selection window open. select the dxf file and then open it.
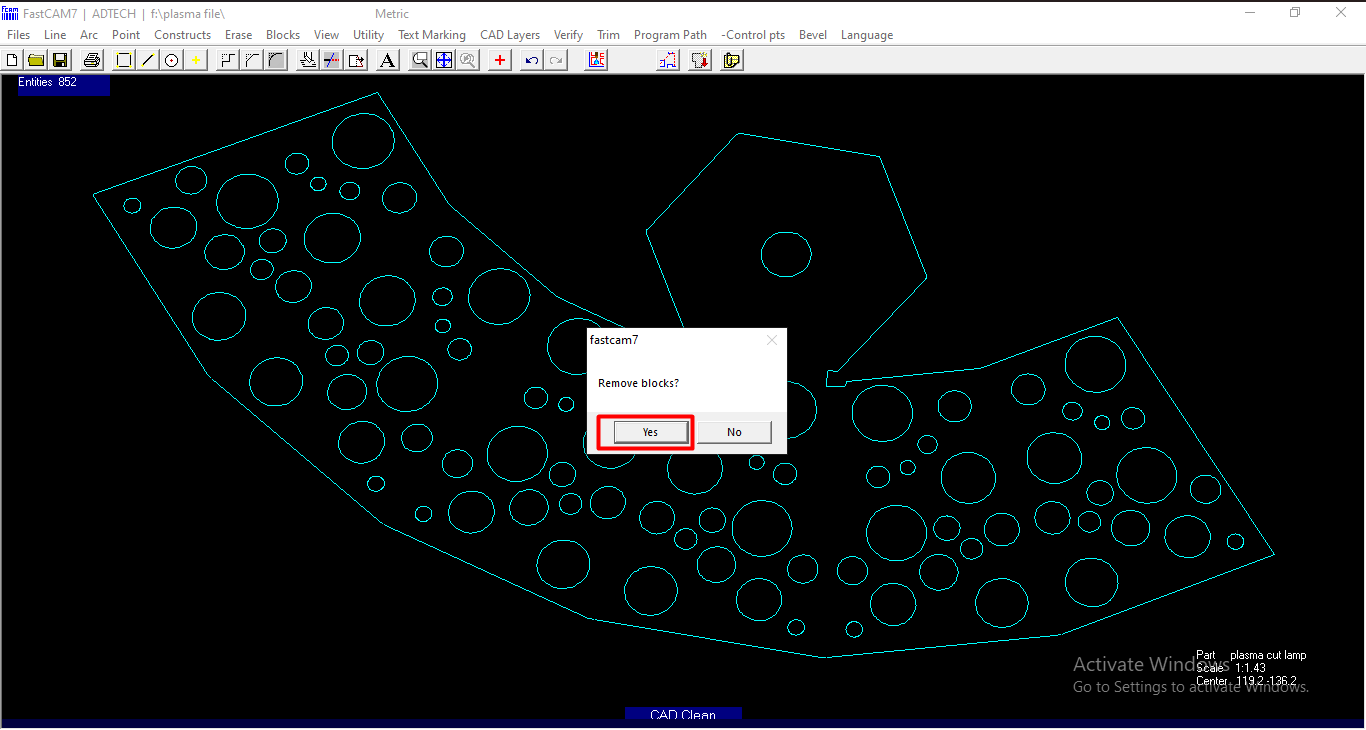
Then a new option arrived which ask us to remove blocks, then click on yes
then go to the programme path option and then select fastpath option
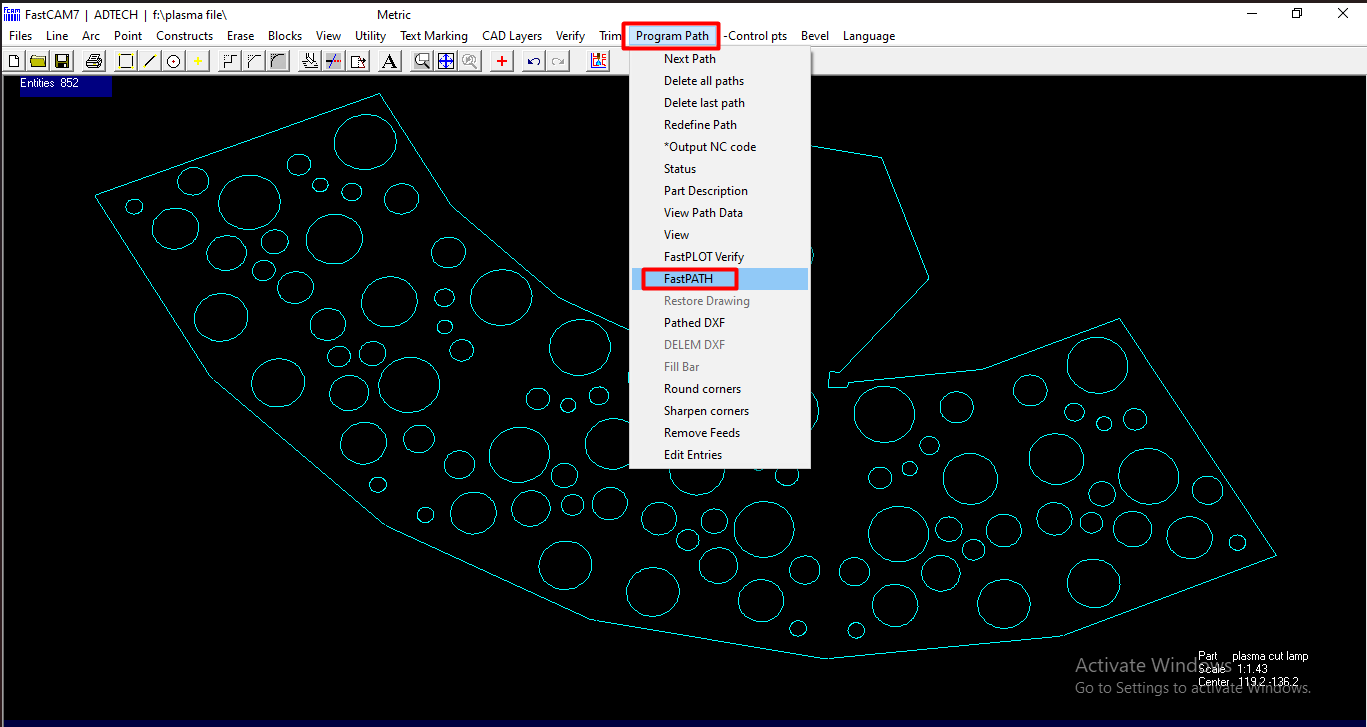
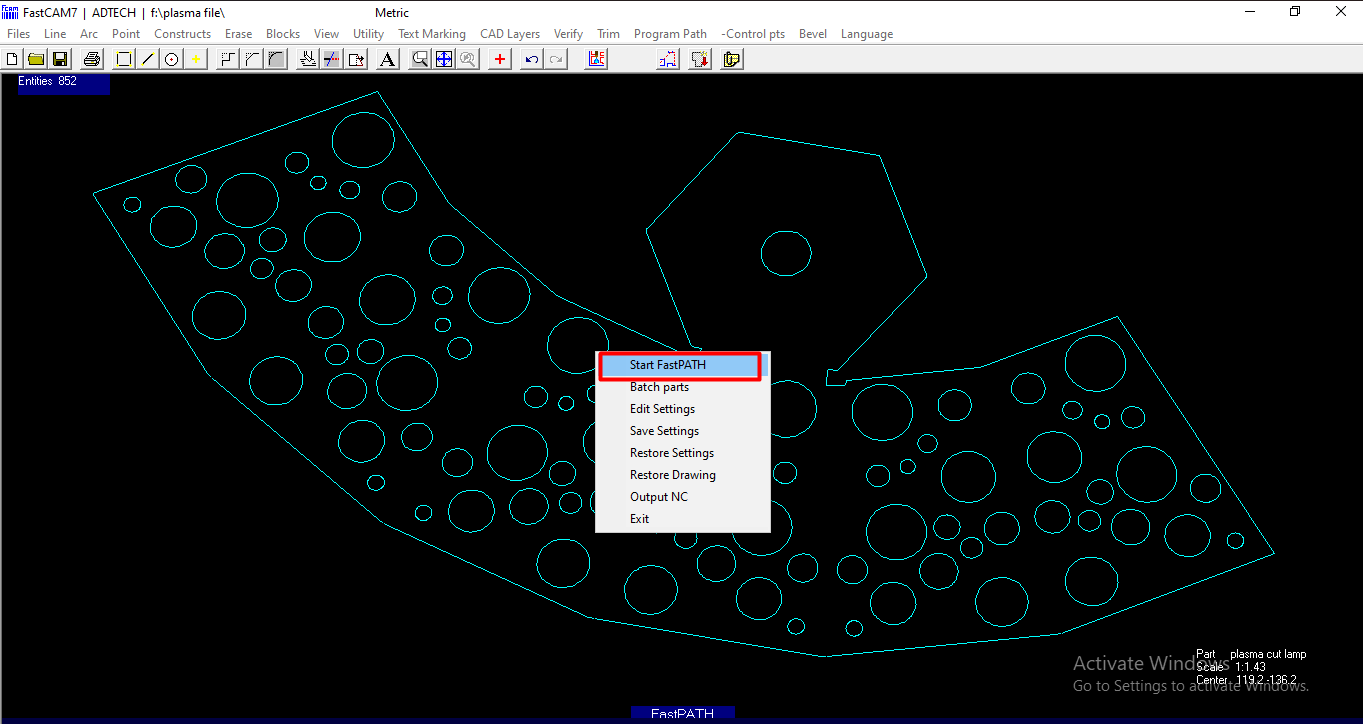
After that select start path option and then Enter.
Now the new option arrived which ask us to OUTput NC code, click on yes
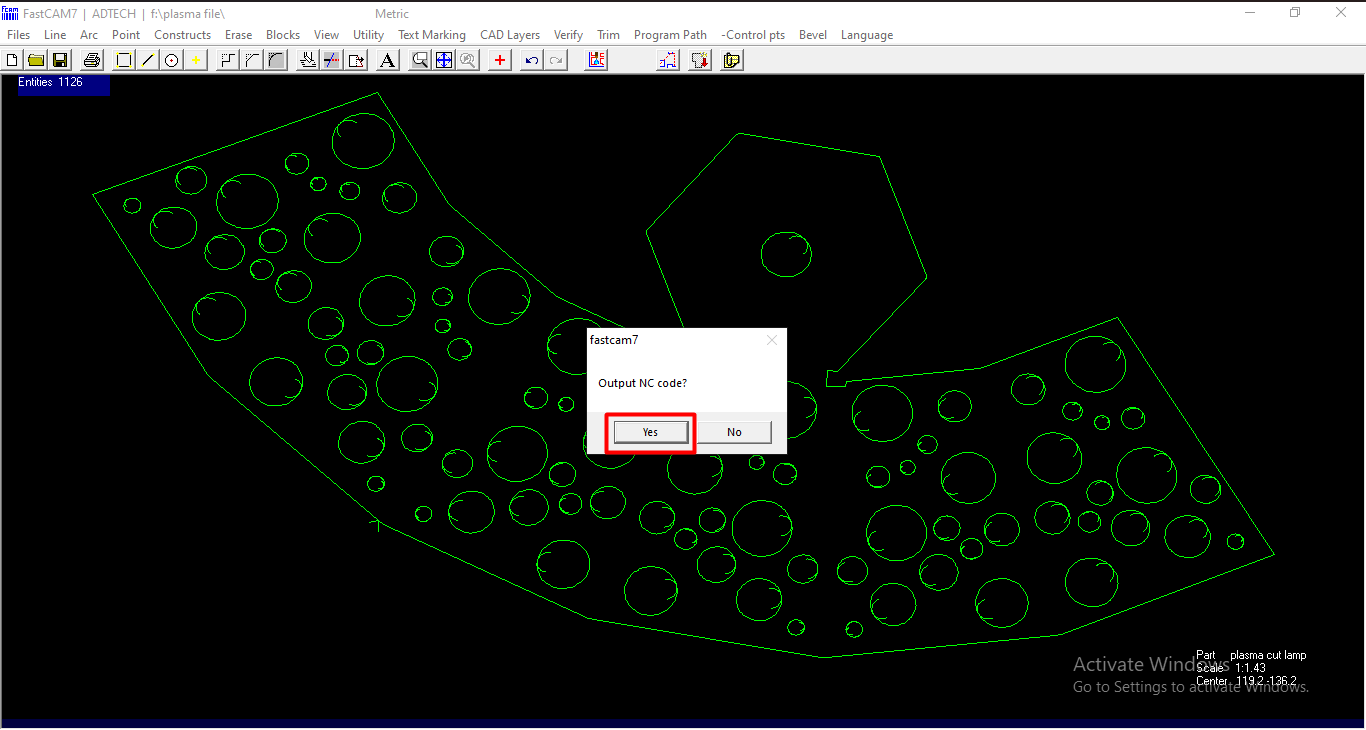
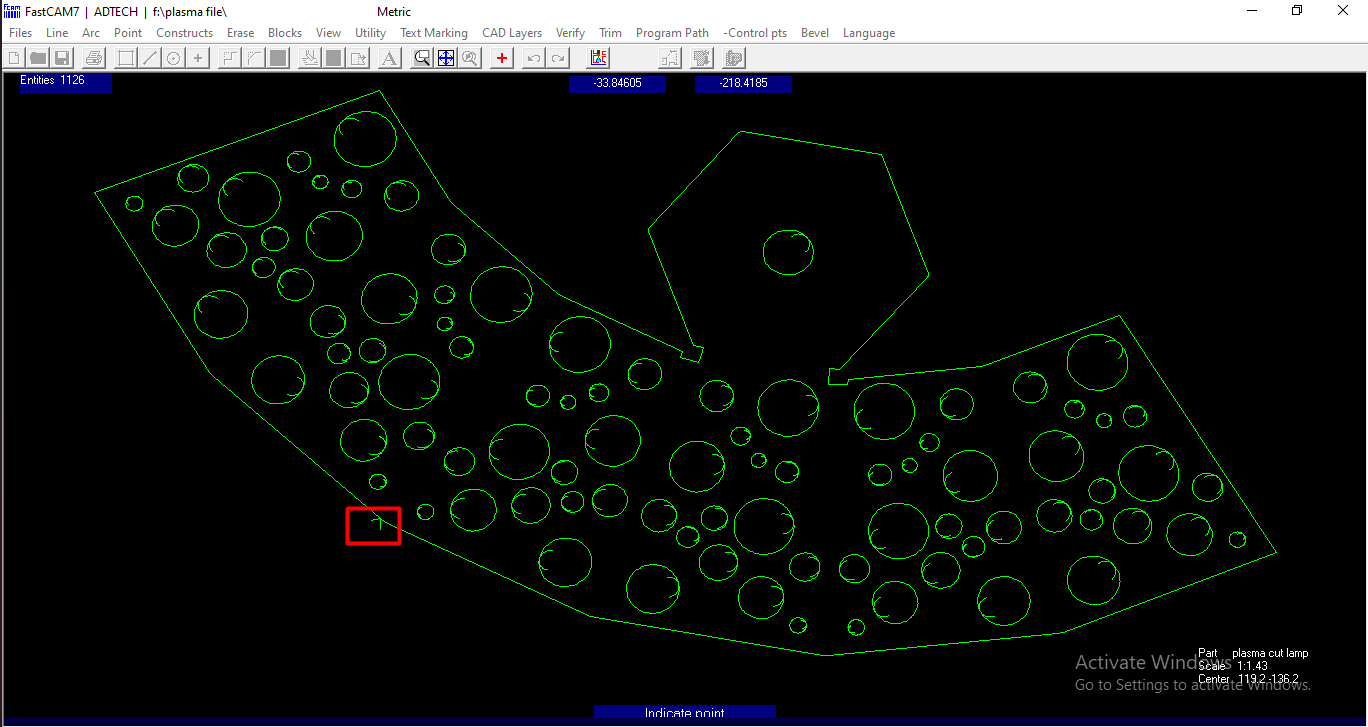
Then click on that option on the file then a gcode file appear and this g code file save in txt formate.
machine operation
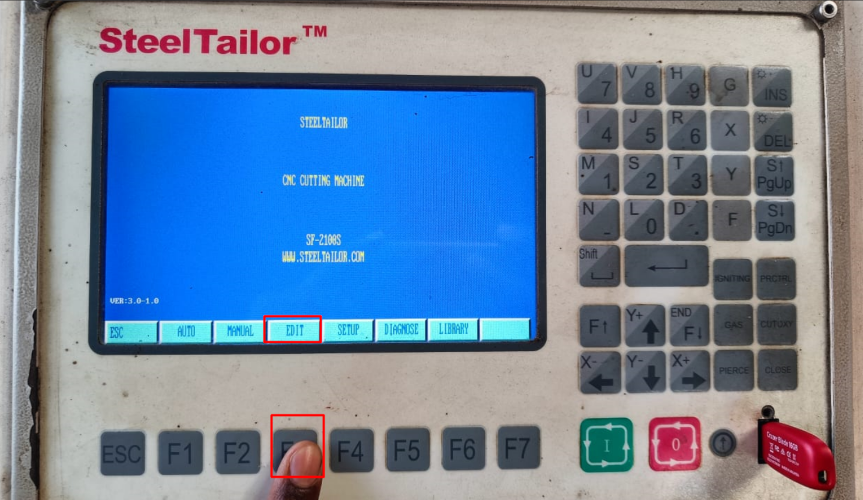
Now we have to upload this ready file into the machine. So we on the machine by doing switch on of the machine. I connect the pendrive to the machine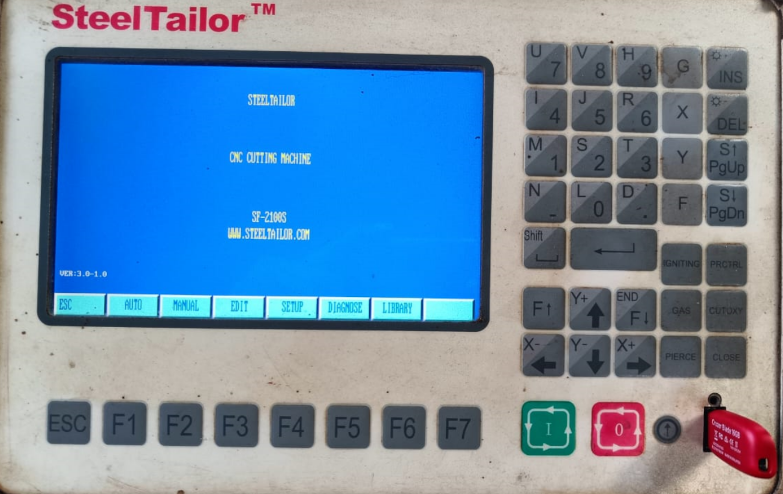
After that Machine is on we see this window in the display.then click on edit option . For edit option we have to press F3 button
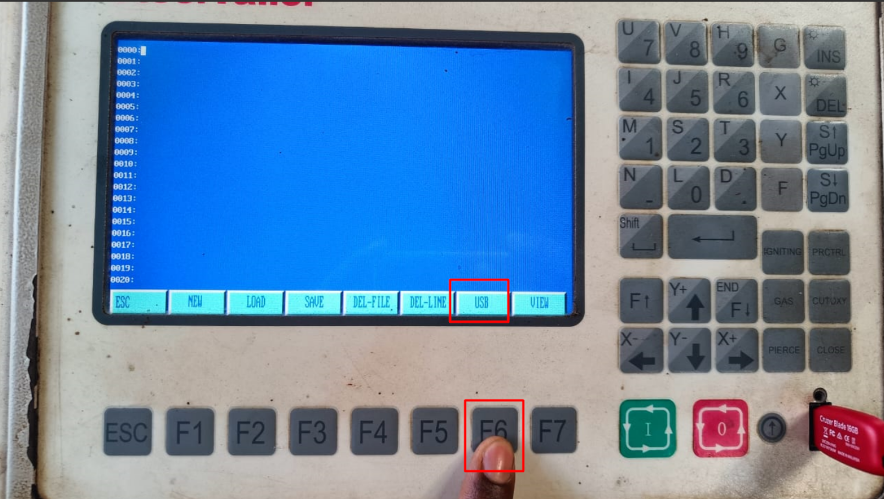
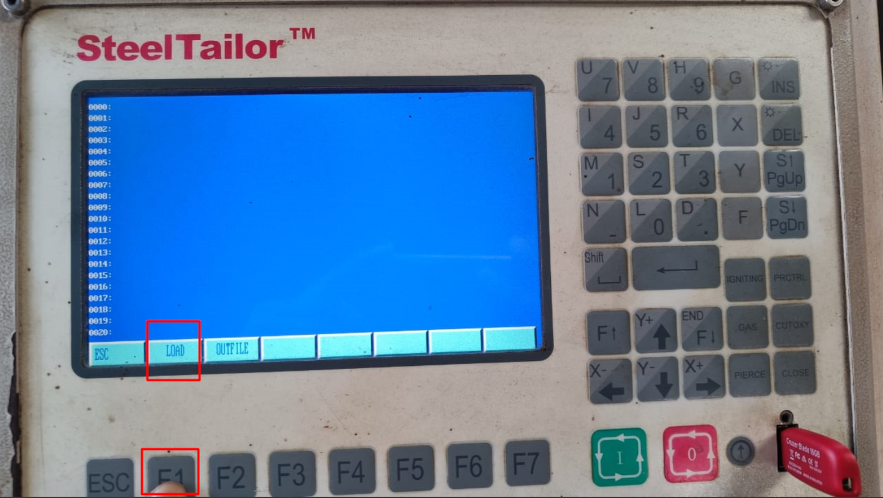
After that We have to select USB option. for this option we select F6 button. After that we select load option. for this option we have to press F1 button
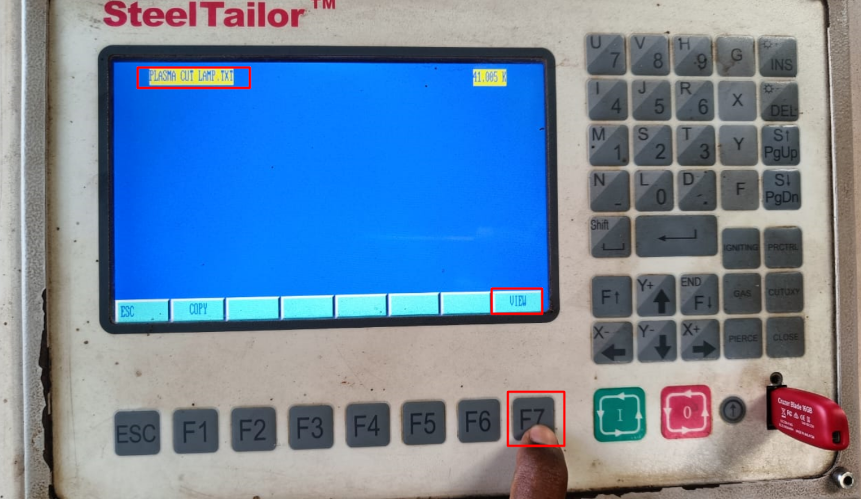
Then we select the gcode file and press on view option by pressing F7 button.
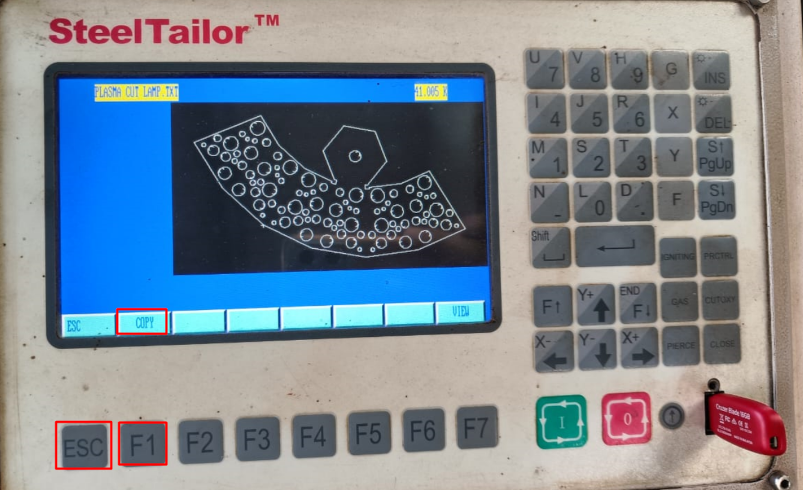
Then we see the file in the display . copy the file and press escape button and you go to the home again.
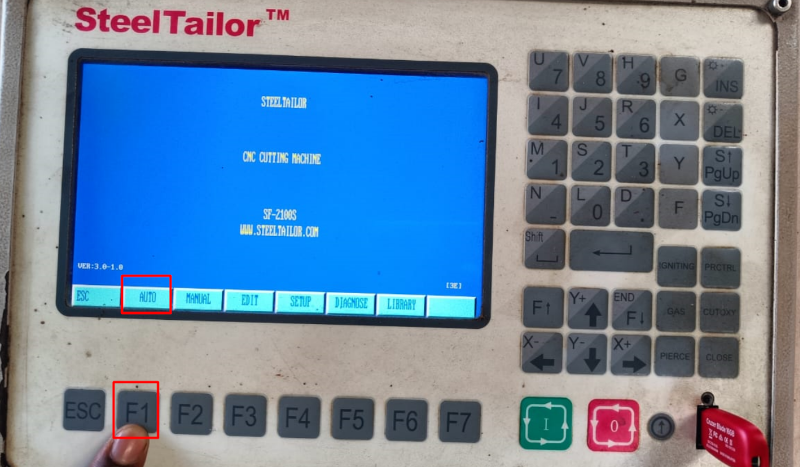
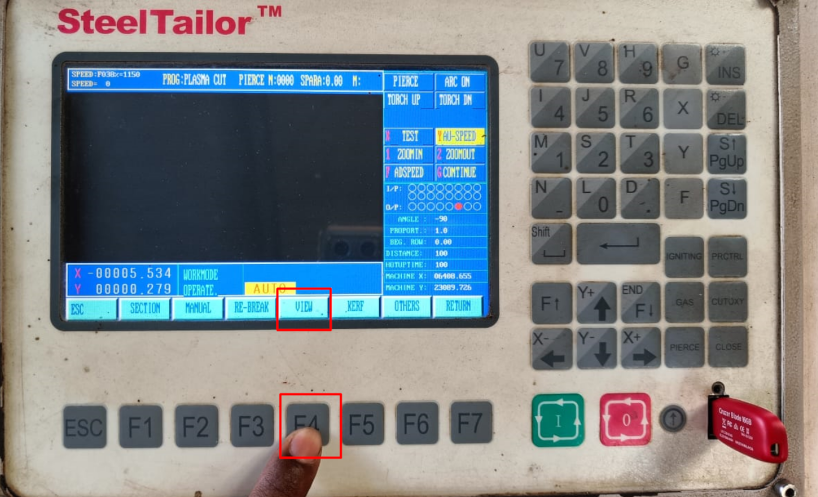
Now select the the auto option by press the button f1 button and then go to the view option by pressing F4 button.Then we see that the file is appear in
the screen. then press Esc button.
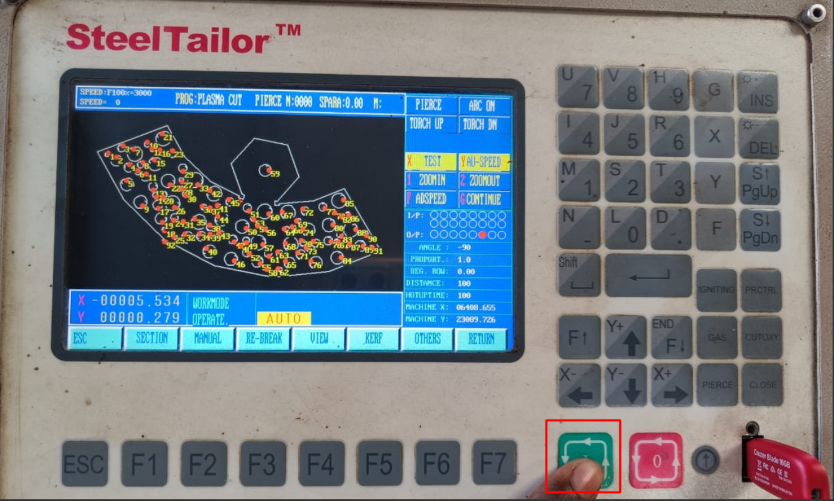
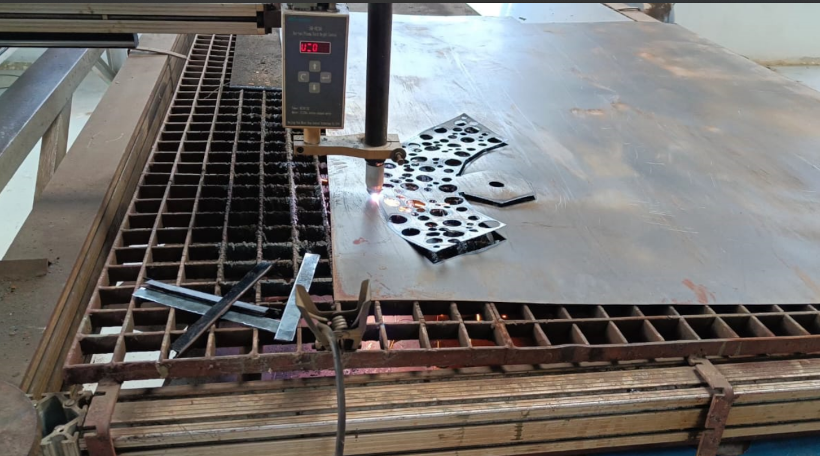
Now I set the sheet properly on the bed and then set the origin of the nozzle manually

Now click the X button and then press start button . This time nozzle cover the frame area of the file where cutting process is occured.after that
again press x button and then press start button .this time the cutting is started.
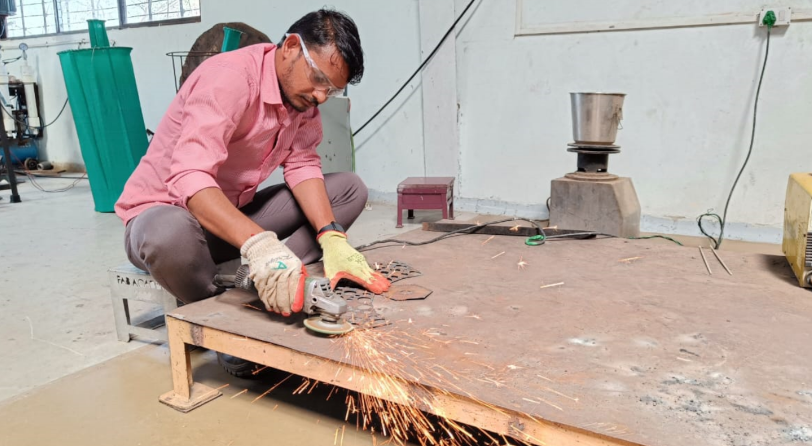
After cutting we have to finish the sheet by grinding process. So remove the extra material and smooth the surface of sheet metal by using hand grinder
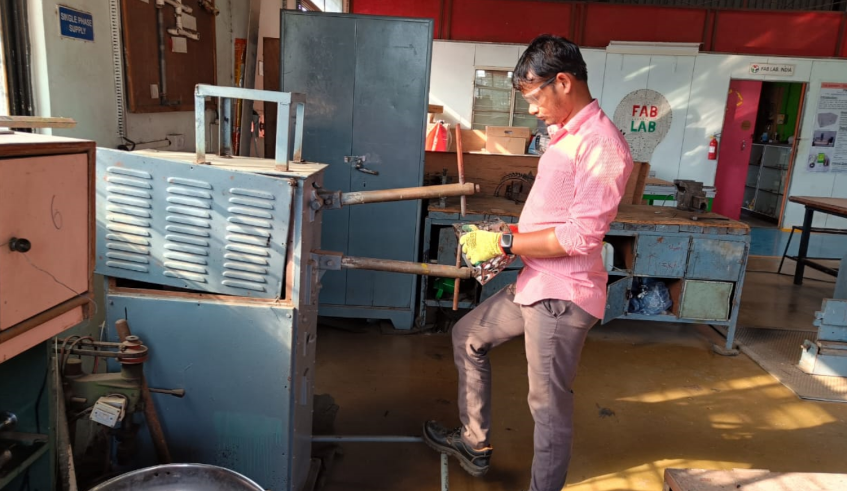
After that I bend the sheet by sheet bending machine
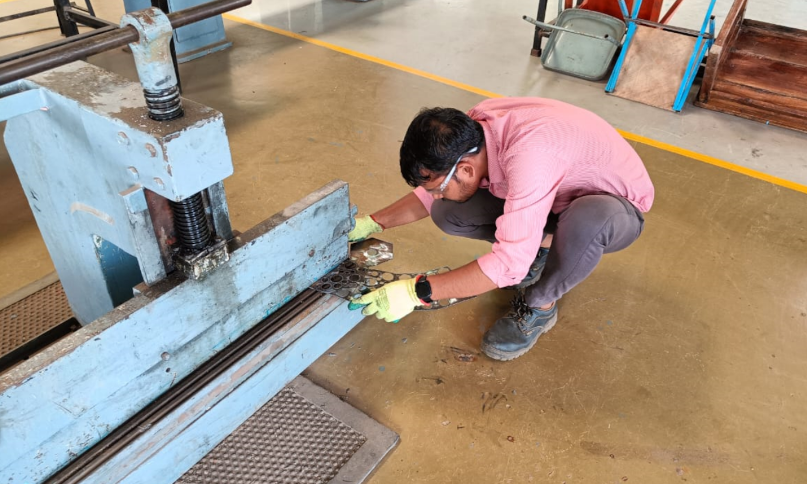
then I join the sheet by using spot welding. Firstly I tried arc welding but it melt the sheet. so I decided to do spot welding and it work on it
then I applied red oxide to it to prevent it from rust and then it look good.
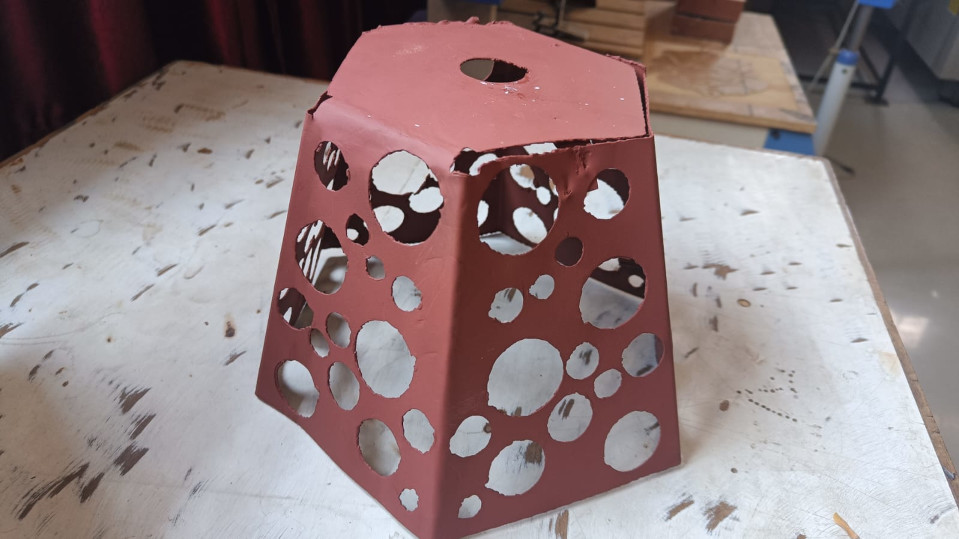
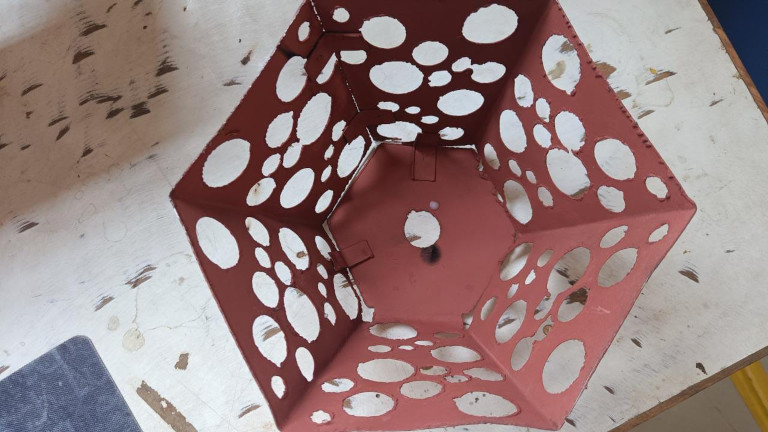
Final result
learning outcomes
-I learned about the embroidery machine and make design on cloth with this.-I learned about the sheet metal conversion from solid to sheet in solidworks.
-I learned about the cnc plasma cutting machine and its g code generation software.
What went wrong
-At te time of embroidery, The machine breake the thread due to the the weakness of thread.-At the time of plasma cutting The machine stopped and does not cut one edge. So I cut it by using hand grinder machine
-when I do welding I realise that the arc welding are not suitable for sheet metal.